Power BI – M Code If Statement
By: David Rohlfs
Introduction
When you start getting into M Code in the Power Query, you find that you need to know a few things sooner than later. Some of these are adding new columns, creating variables, and utilizing If statements. If statements are important to know because they have such a wide range of uses.
In this blog we are going to go through when to use an if statement, some problems that you may experience, and a short walkthrough demonstrating how to write an if statement.
When to use it
If statements are very useful in a lot of situations. I prefer to use them when there are only a few options for a problem, or just when I need a simple rule to create a column by. While a common way to use an if statement is when you are creating a new column, there are a lot more functions you can use an if statement in.
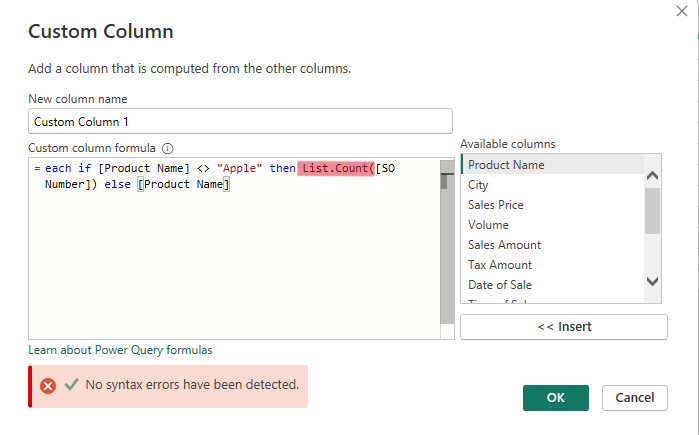
You can nest a different function inside of the if statement to create conditions for when a function is used. Here is an example of this:

Even though an if statement is a lot more malleable to a situation, there is still a common syntax that you need to follow. The syntax is:
if [statement] then [result] else [result]
Where the then result is used if the if statement is correct, and the else result is used when the if statement is incorrect.
You can nest if statements inside of each other. You do this by placing another if statement inside of the then result or else result. Here is an example of this while adding a new column to a table about fruit:
Table.AddColumn(“Fruit”, each if [column 1] = 2 then if [column 3] = “TRUE” then “Apple” else “Orange” else “Pear”, type text)
Notice that the nested if statement has all the appropriate statements with it, then the original if statement finishes its else result. When you create a nested if statement, you need to finish out the arguments for the current statement before you finish the parent statements. Here is another example, but with {} containting the entire statements. Note: this is just for demonstration purposes and does not work inside of M Code.
Table.AddColumn(“Fruit”, each {if [column 1] = 2 then {if [column 3] = “TRUE” then “Apple” else “Orange”} else “Pear”}, type text)
Common Problems
Using a function in the wrong spot.
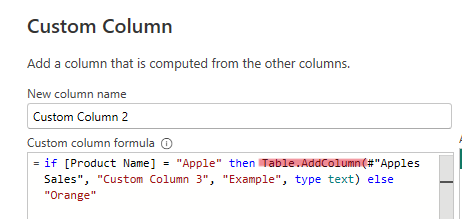
One thing that has messed me up before is when I use a function in the wrong spot of an equation. For instance, if I put a Table.AddColumn function inside of the then or else argument then I will get an error. This is because the column will need to be created for all the rows whether they need data or not. Here is an image of an incorrect equation and a correct equation:


Walkthrough
In this walkthrough we are going to go through a quick demonstration putting together an if statement in the custom column interface in Power Query. We will be building a column that looks at a previous column and determines based on that value, what the result will be.
To start you need to go to Power Query.

Now we can select the query we want to work in, click on the Add Column ribbon, and select Custom Column.

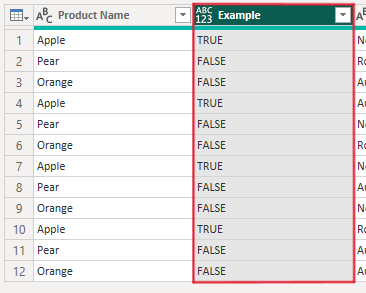
I am just going to name this column “Example” then start building my if statement. To start, we are going to determine the result based on what the Product Name column is. After that we are going to write the then result and say that if the equation is correct, then we want the result as “TRUE”. For the else result we are going to make the result “FALSE” if the equation is not correct.

Once we have created our new column, you should always check that your results are what you expect them to be.

Conclusion
Creating an if statement in power query is simple, but it is something that has a lot of uses to it. If you still don’t feel comfortable writing M Code, I suggest reading through some of the blogs linked below. A couple of them go into more detail on how to code in M, and a couple of them give alternate ways to create a column in Power Query.
Links to Related Articles:

Comments
One Response to “ Power BI – M Code If Statement ”
[…] M Code If Statements […]
Leave a Reply
You must be logged in to post a comment.