Power BI Conditional Column
BY: David Rohlfs
Introduction
Conditional Columns are a function that is meant to use operational if statements in Power BI. It can be very helpful because it creates a new column that is referenced from an existing column.
In this article you will learn When to Use it, some Common Problems, and go through a simple walkthrough demonstrating some of the capabilities of this function.
When to Use it
The conditional column function can be very helpful if you are trying to use operations in your data (less than, greater than).
This function can use different operations for text, such as:
- Equals
- Does not equal
- Begins with
- Does not begin with
- Ends with
- Does not end with
- Contains
- Does not contain
This function can use different operations for numerical values, such as:
- Equal
- Does not equal
- Is greater than
- Is greater than or equal to
- Is less than
- Is less than or equal to
I prefer to use this function with slicers, but it can be very helpful within visuals. Conditional columns can take a numerical value and separate below, equal, or above that value, then giving it a value that you determine (True, False, Yes, No, etc.).
Common Problems
Choosing to do a “Between” statement.
There is not an option in the conditional column pop-out to choose a “Between” statement. A way that I found to work around this was by using all greater than operators with multiple clauses.
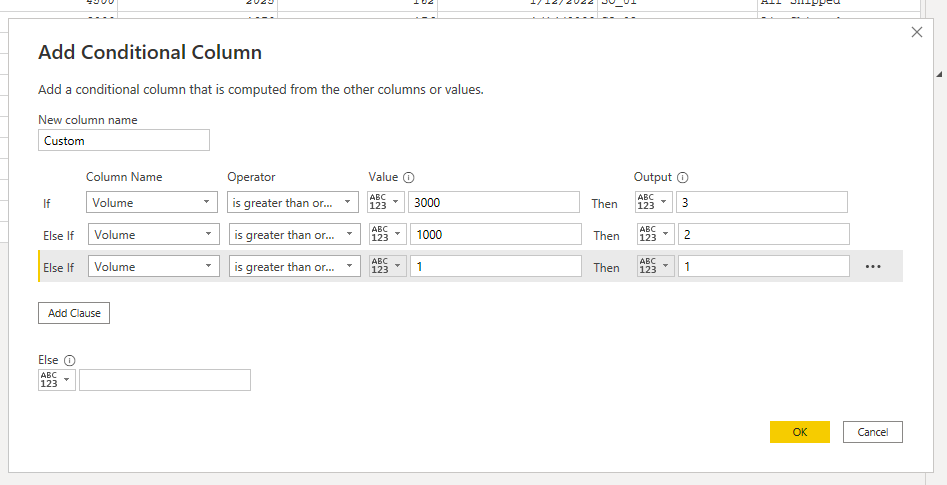
If you do this method with greater than operators, make sure that your largest number is at the top of your clause list. You can always move around the clauses by clicking on the ellipses at the far right of the clause.
Walkthrough
In this walkthrough, I will be showing a simple way to use the Conditional Column function. I will be setting a value to volumes of products that are less than and greater than 1000. At the end of this walkthrough, I show a small demonstration of how this can help you build visuals and reports.
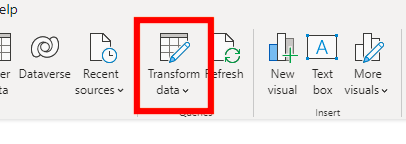
First you will want to go into the power query.
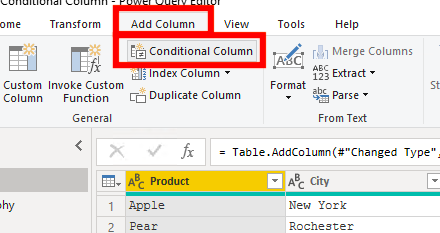
Next you will want to select the column that you are basing your conditions from. Then click the “Conditional Column” function that is under the add column tab in the ribbon.
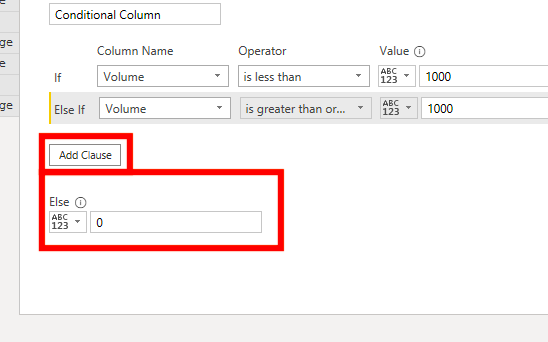
Now you will have a pop-out that should look like this. In this box, you will have different options of choosing your column, writing your condition, and what output you want. In this example I am going to do a simple expression that tells me if I have more or less than 1000 units sold with the condition giving “1” for less than 1000 units, and “2” for equal or more than 1000 units. Be sure that you give a meaningful name to this new column.
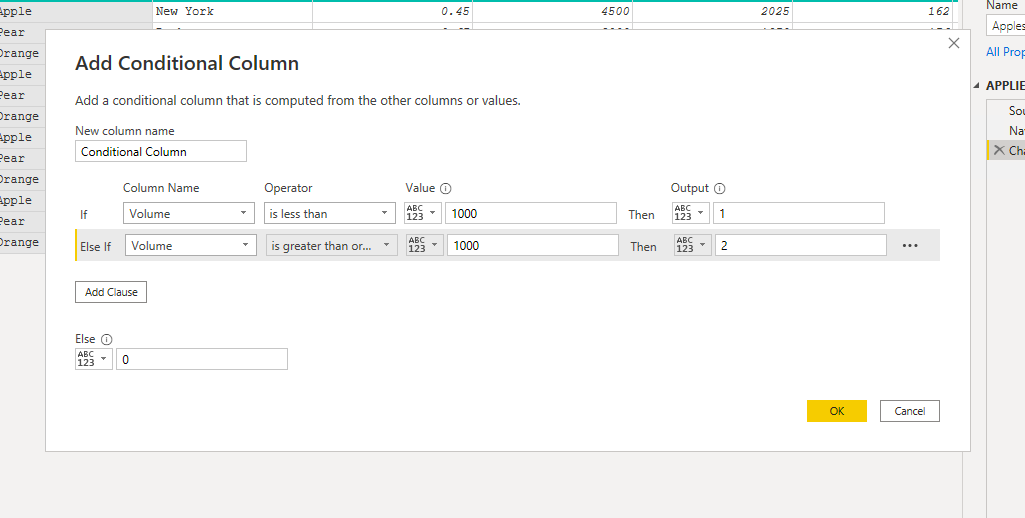
You can also add more than one condition by clicking on the “Add Clause” button under the if statement. If you want to add data for data that is not presented in the condition, you can enter that value in the “Else” field at the bottom of the pop-out.
After you enter your data click on “OK”

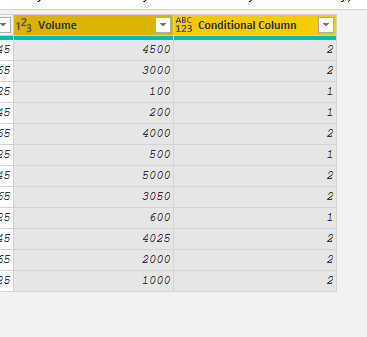
Now you will see a new column appear on the far right of your data set. This is a good point to quickly verify if the statement you wrote was correct by manually looking at your reference field and your new field. Remember, I wanted to have a “1” if the volume was less than 1000 units and a “2” if the volume was more than 1000 units.
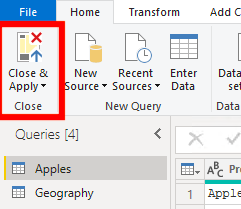
Now you can Click on Close and Apply in the top left corner to go back to the report page.
This is a demonstration of what you can do with this data. What I did was Replaced the “1” with Ground Shipped, and “2” with Air Shipped. This way I can use a slicer or filter between the two to determine differences in the data.
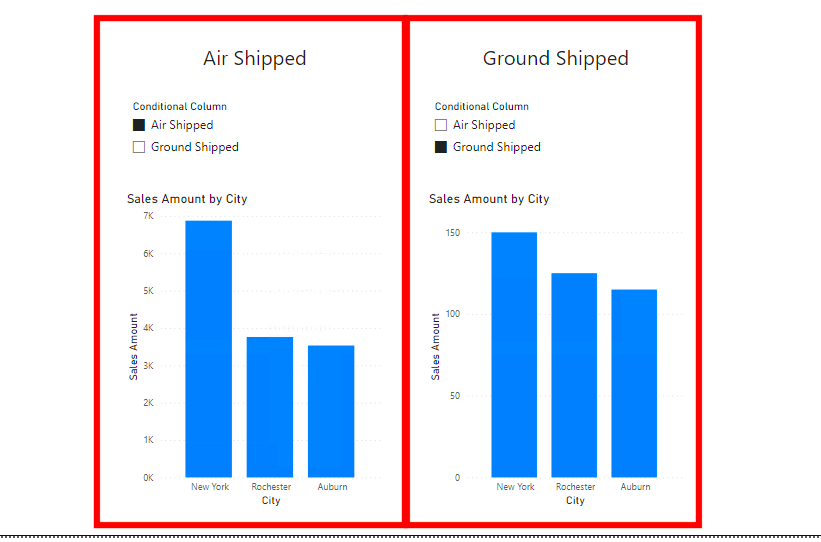
The graphs are showing the Sales amount by the city, which was impacted by the sales volume that we used the conditional column on. This is a very simplified example of what can be done with this function, but you can easily create very descriptive visuals using this function.
Comments
One Response to “ Power BI Conditional Column ”
[…] Power BI Conditional Column […]
Leave a Reply
You must be logged in to post a comment.