Power BI Sync Slicer and Edit Interactions
BY: David Rohlfs
Introduction
Slicers are one of the most utilized parts of many reports, and because of that they can do all sorts of things. In the past, EPM Strategy has covered some of the advantages of creating a slicer (Filter vs. Slicer), and how to create a Hierarchal Slicer. Considering these past blogs, this blog will assume that you understand slicer basics. In this blog, we will learn about the edit interaction’s function, and the sync slicer’s function. Both are separate functions from each other, but they both build onto a basic understanding of what slicers can do.
In this blog we will go through when to use each function, some common problems with each of these functions, and a walkthrough using these functions separately from each.
When to use it
Both editing interactions and syncing slicers are going to add another level of complexity to your report and slicers. But, with using either one of these functions, you can create a smoother report for your end user. Much of what both these functions do adds to the ability of a single slicer to interact more and less with the page and other pages.
Edit Interactions
Edit interactions allows a report builder to pick and choose which visuals that a slicer is going to interact with. When you use this function, you will be allowed to stop the interaction of a slicer with any visual on a page. This is very useful if you are wanting a card or visual to stay the same as a reference for your page.
I like to use Edit Interactions if I am making a visual that is supposed to be referenced by the end user. This can look like a visual off to the side or a card that shows the total value of something, or a table that is set to be the same for the page, regardless of slicers.
Sync Slicers
When a report builder uses the sync slicer function, the slicers on two or more pages will become synchronized with each other. In doing this you can create a page of only slicers, use the drill down more appropriately, and create a stronger story between your pages. This is a useful function if you want to create a home page.
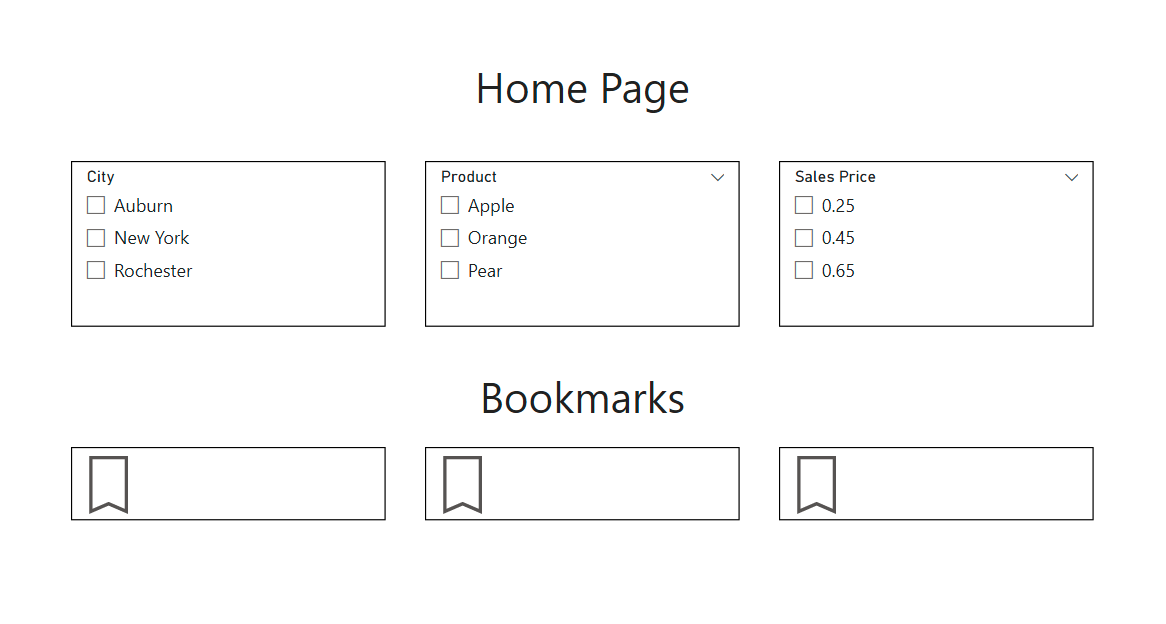
I use the sync slicer’s function when I am creating a home page, or a page that interacts closely with the next page. This example is of a home page that has a lot of slicers, but these are the slicers that an end user chooses before continuing to the subsequent pages.
Common Problems
Because Edit interactions and Sync Slicers are meant for complex reports, they can impose some problems on the report builder. Here is a list of some of the common problems that I experienced or are known to me.
Edit Interactions
A problem that I have noticed is that when you edit an interaction on a visual, it can become confusing to represent to the report builder and the end user that a visual is not interacting with the slicers on a page. If you use the edit interaction’s function, I would highly suggest that you title your visuals with a phrase that shows it doesn’t interact with the slicer. If you had a date slicer, you could say “Product Sales YTD” with another visual interacting to the slicer beside it titled “Product Sales W/ Slicer” so that the end user can easily understand the visuals.
Sync Slicers
One of the problems that I have experienced when using the sync slicer’s function was slicers changing their style from a dropdown to a list. During the times that this happened, I also experienced other complications that my associates at EPM Strategy had not experienced before. With this problem, it could be that it was an isolated incident, but I would check your report in the desktop version, and after you publish it.
Another problem that is on the cosmetic side is that using this function duplicates your slicers onto the pages you are syncing with. This can create an abundance of slicers on each page, especially if you are using this function to create a home page. To fix this in the past, I would make the slicer small, then hide it behind an image so that the end user couldn’t access it. Another way of avoiding this is not selecting the eye icon on the sync slicers tab. Although I don’t recommend this because you may need to access the slicer on that page later.
Walkthrough
In this walkthrough we will go through an example using the Sync Slicer’s function first, followed by an edit interaction’s function walkthrough. Both examples will already have slicers created and formatted, if you are unsure of how to do this, read the Hierarchal Slicer blog so you have an understanding of how to create a slicer.
Sync Slicer’s
This function works off using multiple pages, before you begin, make sure that you have the pages created that you are wanting to use. You can always change this later but doing this before you start is easier in the long run.
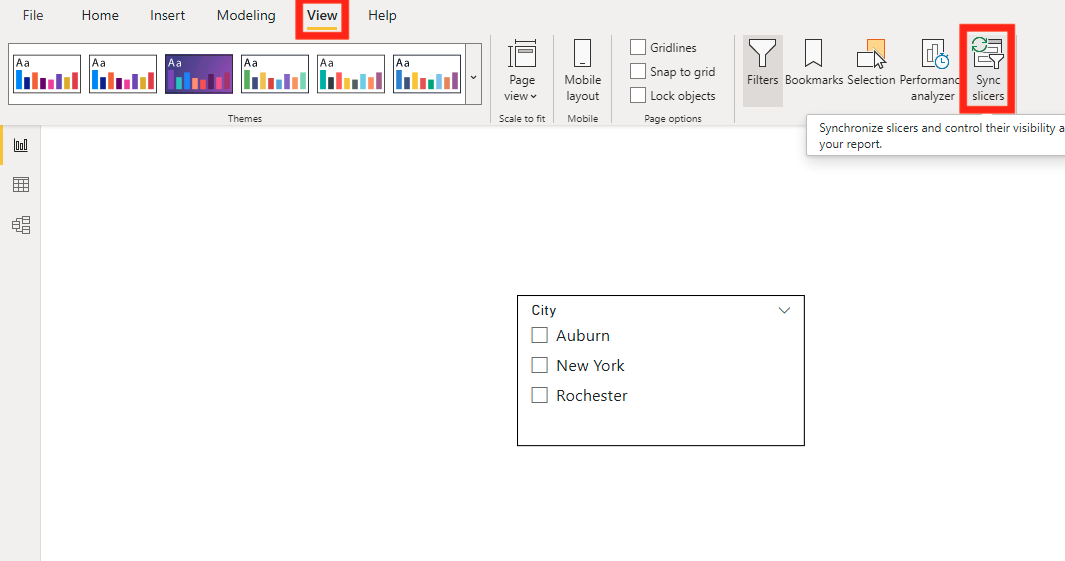
After you have your slicer created, click on the View tab in the top ribbon, then select Sync Slicers.
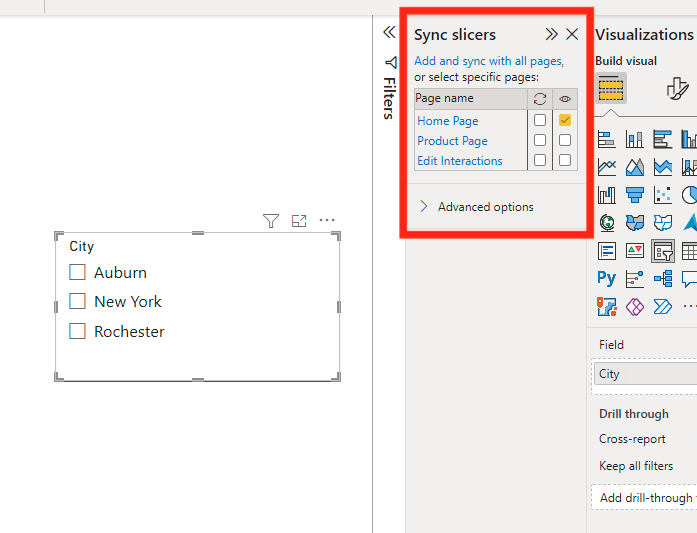
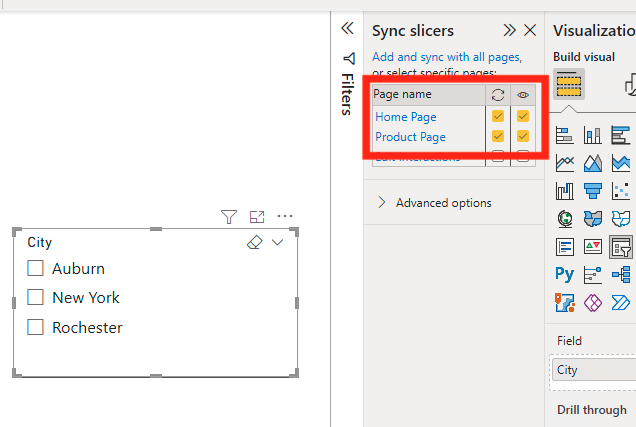
Now you should be prompted to select the slicer you will be working on. Go ahead and do that and you should have a tab that opens next to the filter and visualizations tab. It will have the page name, option to sync slicers, and an option to see the slicer on the pages. For this example, we will be selecting the sync Icon for the home page and product page and selecting the eye icon for the product page.
Once you go to the page that you selected, you should see the slicer appear. And if you have a selection on the slicer, it will synchronize with the other pages.
Although this function is simple at the start, it can become more complex and add a lot of diversity in your dashboard. I have enjoyed using it to create home pages where most of the slicers for a dashboard are on a single page and using bookmarks to jump between those pages.
Edit Interactions
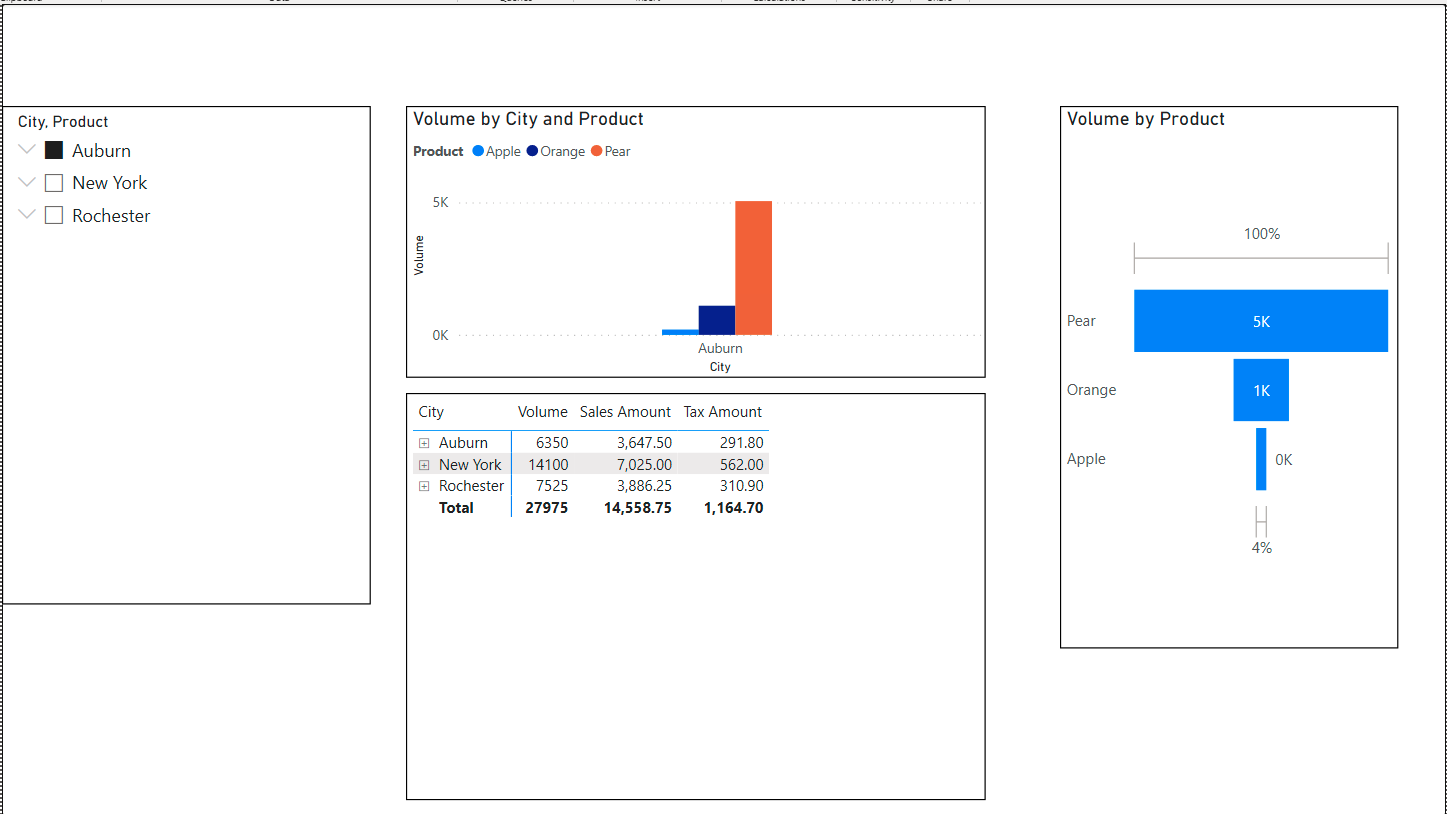
For this example, I have already set up a page with a hierarchal slicer and multiple visuals so that we can test the edit interaction’s function.
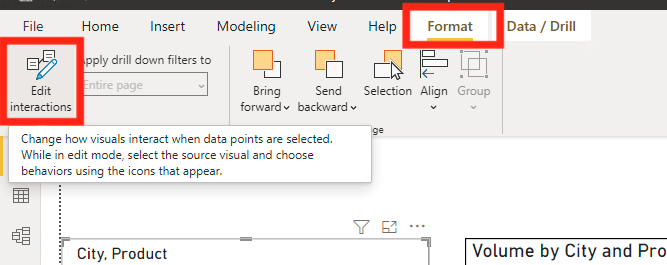
To start, click on your slicer, then click on the format tab that appears on the top ribbon. Now you can click on the Edit Interactions function on the left side of the ribbon.
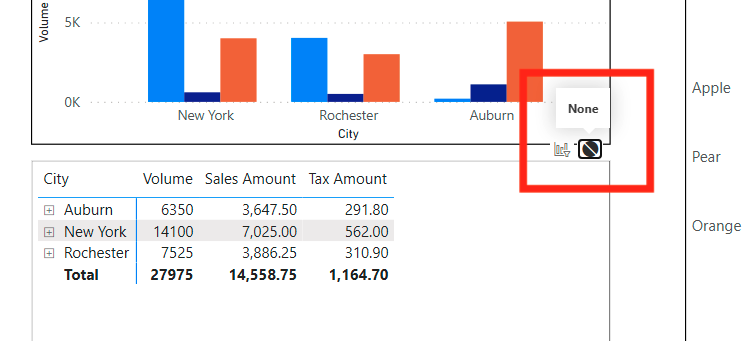
Once you do this, you will see icons on the top of all your visuals. The first is showing if the slicer is set to filter your visual, and the second is to select if you Do Not want your slicer to interact with the visual.
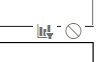
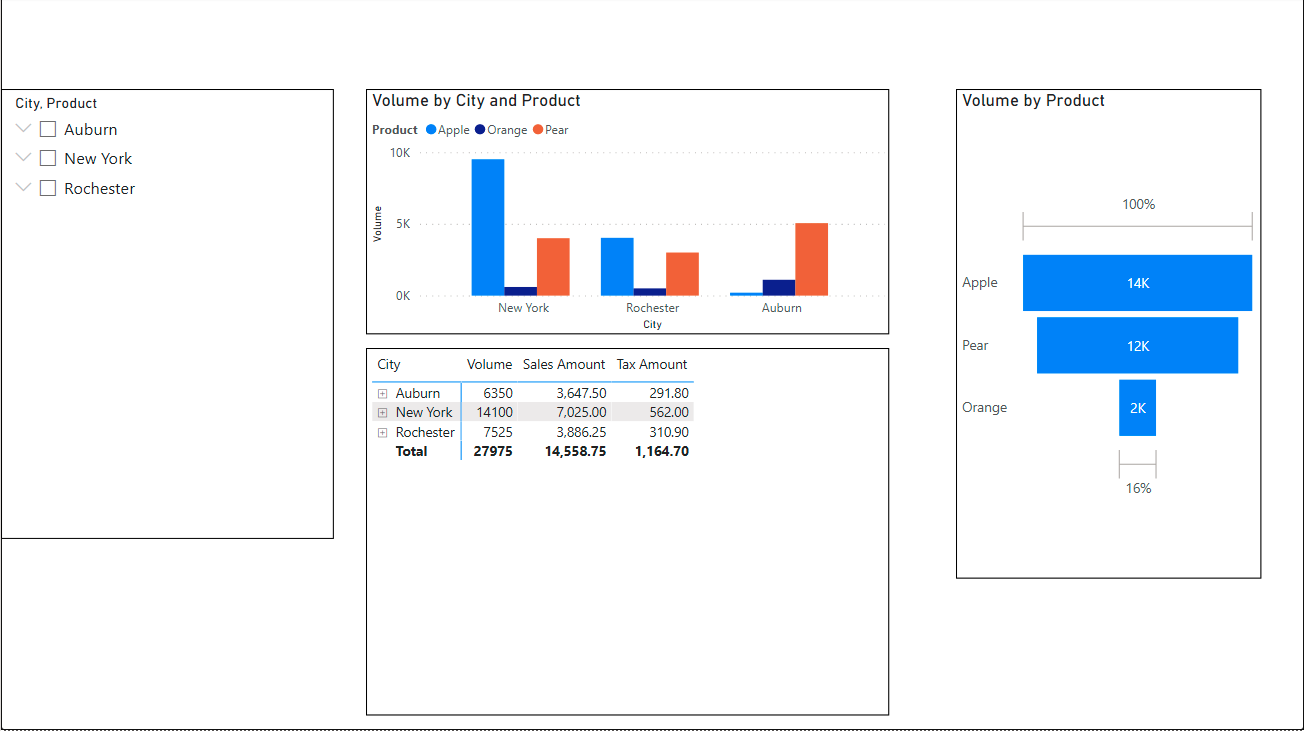
Now I am going to select the None option for the matrix at the bottom of the report. In doing this, I am not allowing the slicer to filter the information that goes into the matrix.
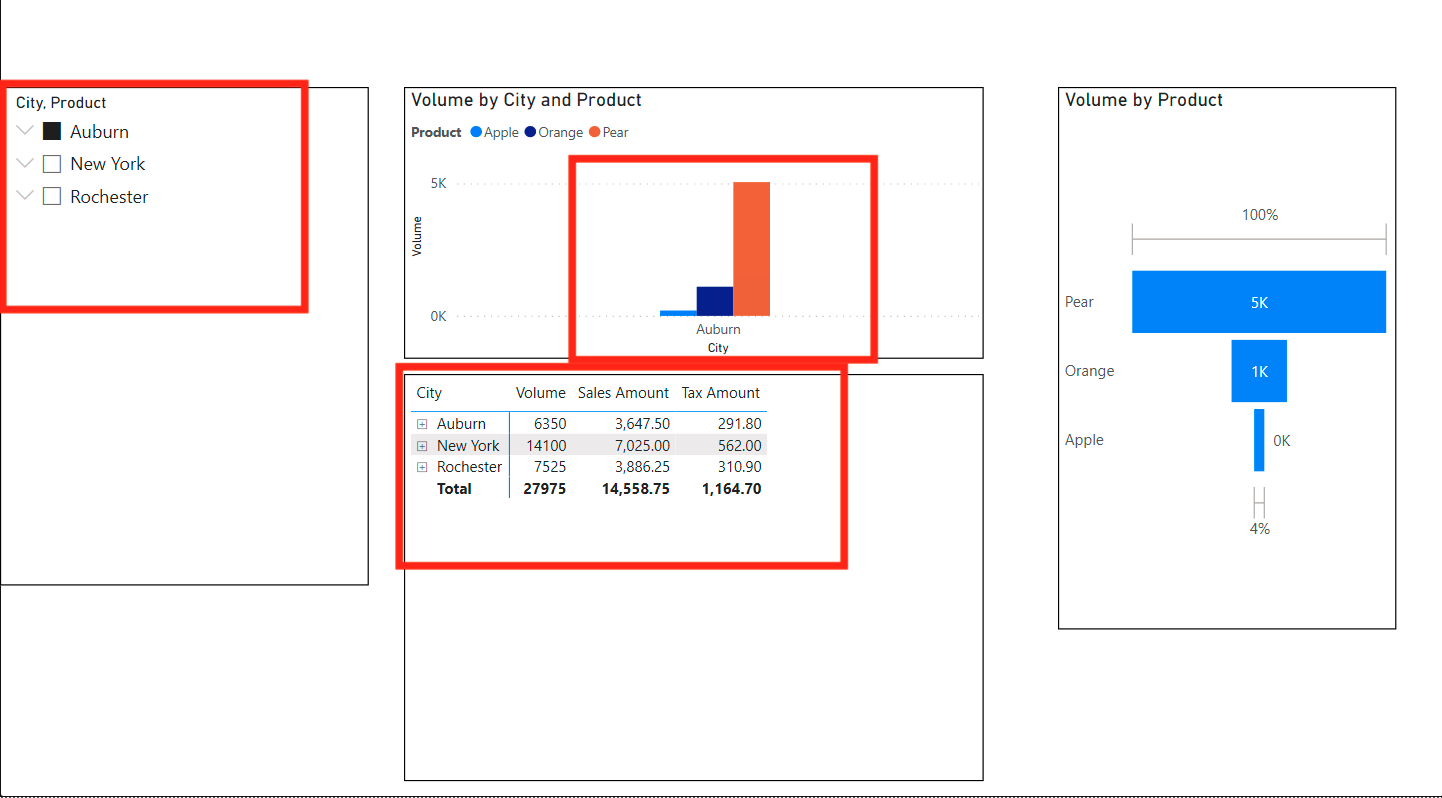
To get out of the edit interactions function, you need to select the function again. After doing this I am going to check that the slicer doesn’t filter my matrix. See that Auburn is selected in the slicer and the two charts show only auburns sales volume. But the matrix still shows all three cities.
You can still use both the edit interactions and sync slicers together. To do that you will need to go through the steps of setting up the sync slicer first, then go through the steps of setting up the edit interactions together. If you do this, you will need to have the eye icon selected when in the sync slicers tab, but the rest is the same.
Conclusion
Sync Slicers and Edit Interactions for slicers are very useful. They allow you to broaden or restrict the abilities that your slicer’s have. In the walkthrough we learned how to use each function, and how they can work together. I do enjoy using both functions when creating reports that require home pages because they allow you an extra level of specificity in your report.
Comments
Leave a Reply
You must be logged in to post a comment.