Power BI – RLS Apply Security Filters
By: David Rohlfs
Introduction
Power BI is all about making things streamlined and accessible. We do this through sharing the reports in the cloud through apps, creating real time dashboards to view data in the last second, and of course creating one report that many people can use! Then you may say, but how do I make sure everything is secure if it all is in the same report? Row Level Security (RLS)!
This blog will focus on an aspect of RLS that is around Dynamic RLS and the Apply Security Filters button in the relationships.
When to use it
Row Level Security (RLS) is one of the most used features in Power BI. It has been around since the beginning and is the ideal way of securely filtering row level data. RLS is in fact so helpful that we have systems we can connect to like Active Directory (AD). You can set the Power BI groups to the same AD group and let everything work.
There are a lot of options with RLS in Power BI, and one of the best for large groups is setting up dynamic RLS. We do this by pulling in a security dimension with the correct fields (name, email, allowed dimension values), and tying it to our dimensions. Then we simply filter on our security dimension in the Manage Roles pane and very quickly we have a security system that mimics the security dimension we pulled. But, for this to work properly, we need to turn on the Apply Security Filter option in the relationships.
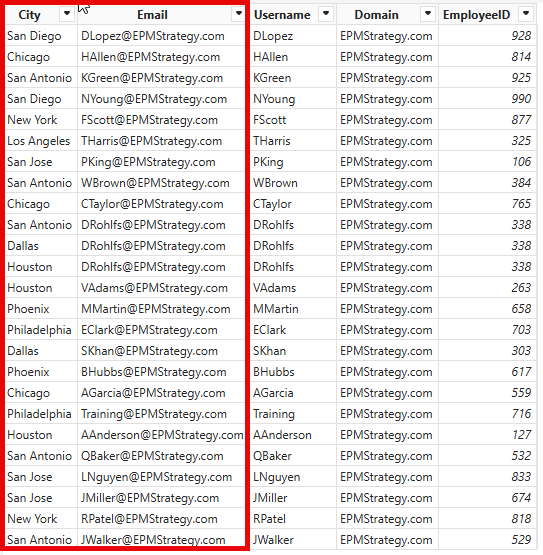
In Dynamic RLS, our goal is to connect our report to an existing table/dimension that has the appropriate fields and is maintained. Some of these fields are likely Email, Name, ID, and the dimensions allowed. So, if we are filtering by geographical location (e.g. City), our security dimension may look like this (of course with many more people/rows):
The issue that we get is that because we are filtering on a dimension from another dimension, the flow of rules (whether one table is allowed to filter another) doesn’t go that far up. For our security dimensions filters to flow to the dimension and up to the fact table, we need to check the “Apply Security Filters” button in the relationship. This will effectively let our security dimension pass through the real dimension and filter our fact table.
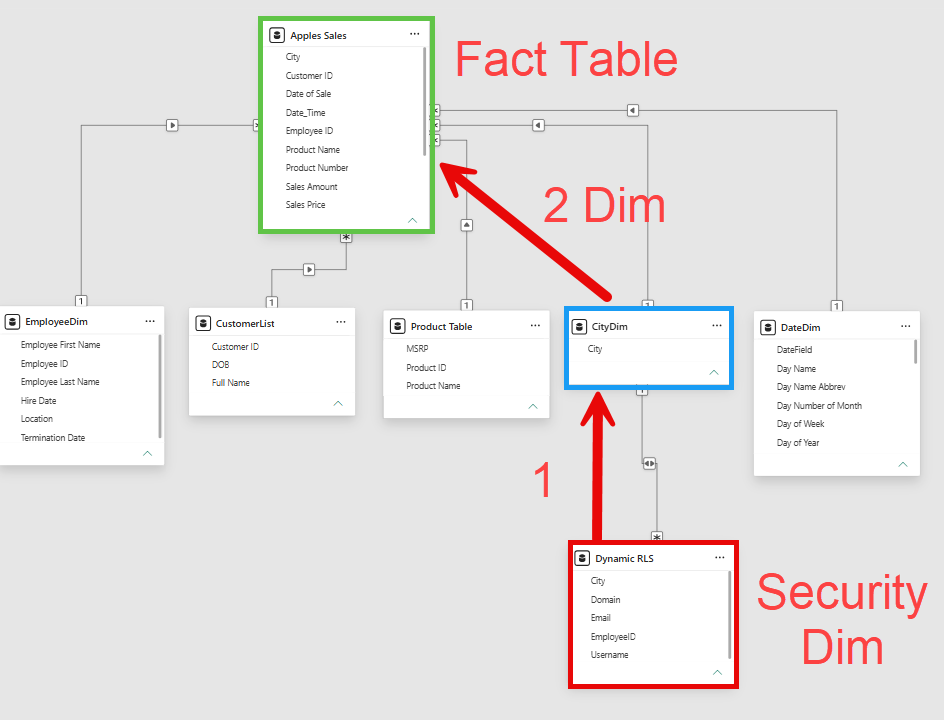
In the above image, relationship 1 is a both relationship from 1 to Many. We need this to relate the two dimensions together. We also use the Both cross filter so that Power BI knows these are effectively at the same relationship level. Relationship 2 is a Single because we are going from a dimension to a fact table.
Walkthrough
In this walkthrough, we are going to demonstrate where this security filters button is.
First, we need to identify our security dimension and the dimension we are filtering on (geography, date, store #, etc.). For this example, we will be using City. Also, my email that I will test with is DRohlfs@EPMStrategy.com.

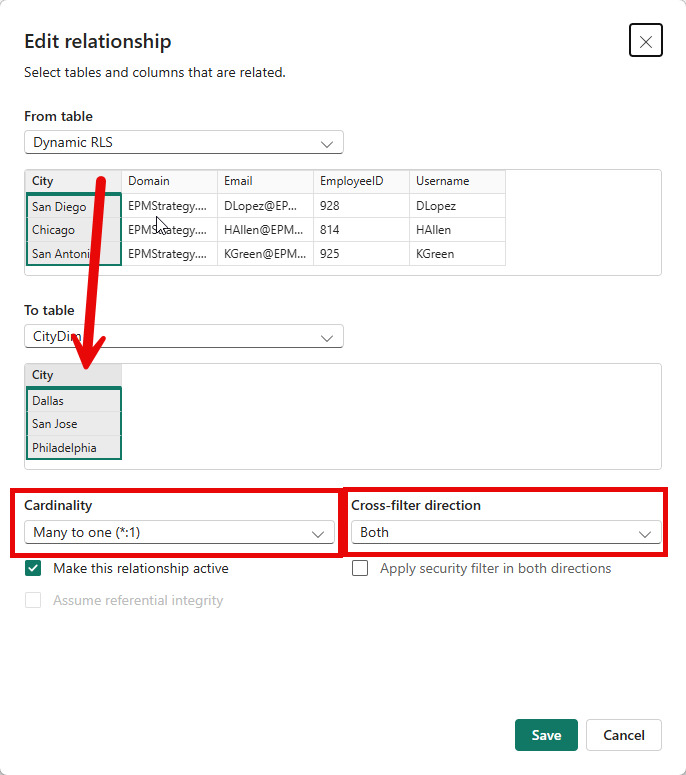
Now we can open that relationship, create it, and make sure we don’t have a many-to-many. (Either by going through management relationships or to the model view)
We do need this to be a “Both” on the Cross Filter Direction.
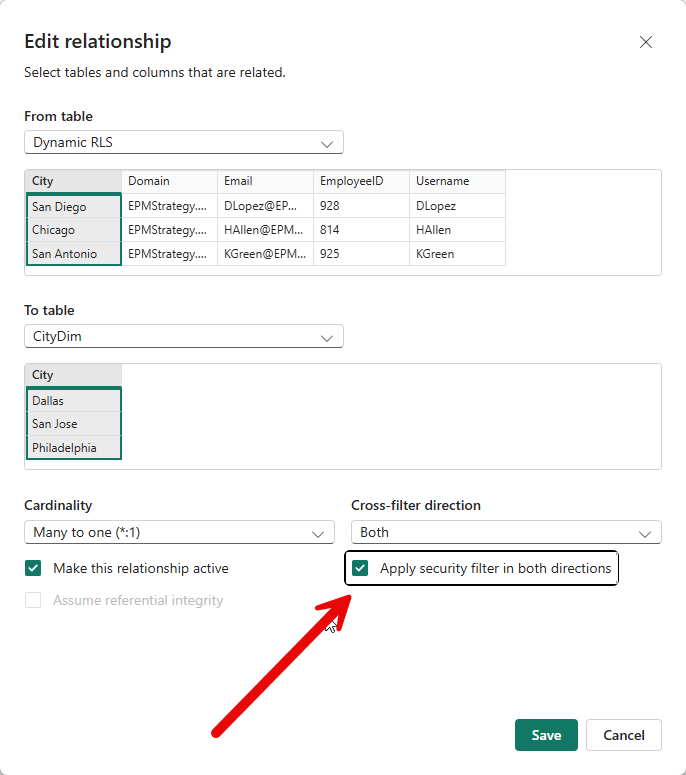
Next, we just turn on this “Apply Security Filters” checkbox and click Save, then our security dimension will be allowed to filter our dimensions!
Conclusion
While the normal RLS system works great for small numbers of people, when we get to have hundreds of people in the same semantic model, security becomes forefront. With the Dynamic RLS, we can set the rules in one spot and pull them into Power BI to work for us! If you enjoy this blog, please check out some of the other related blogs linked below.
Links Related to This Blog:
Comments
Leave a Reply
You must be logged in to post a comment.