Power BI: Fuzzy Match
BY: David Rohlfs
Introduction
If you have worked in data for almost any amount of time you will know how messy it is! There are and will be so many times where the data won’t match correctly or isn’t just perfect, and when this happens there is an amazing function called Fuzzy Match. Fuzzy match is used when you are trying to merge two sets of records that are not matching perfectly.
In this blog we will go over when to use fuzzy match, some common problems that you may encounter with fuzzy match and go through a short walkthrough showing how to get to and how to use fuzzy match.
When to use it
It can be hard to determine when you want to use a fuzzy match. Because fuzzy match allows room for error there are a lot of concerns and verification that take place if you decide to use this function.
If I choose to use a fuzzy match, I try to make it on a semantic model that will either be changing and updating regularly, or on a semantic model that is too large to create an intermediate table for the merge. When the queries that I am merging with are small, I like to create an intermediate table (Transformation Table) because I know that the table can handle any of the oddities in the data and that I have all of the control to how my data is merged.
Before you start using a fuzzy match you should try to know and understand your data. It is much more likely that you will use a fuzzy match on a set of data that isn’t super clean and perfect, but because of this you need to know your data so that you understand how the fuzzy match will affect your data. The last thing that you want is to try learning your semantic model after you have completed a large fuzzy match that did not work!
A big advantage of using a fuzzy match in your merge is that you can keep the normal settings of a merge but only change a small aspect like case sensitivity or combine parts. You do this by selecting the fuzzy merge and setting the similarity threshold to 1.00; this threshold indicates that you only want exact matches. But when you do this, you still get the option to change some of the other settings. Thus, you can have a merge that still needs exact matches but ignores case.
Common Problems
A problem that you will probably run into if you are using fuzzy merge on a complex set of data is that there is no perfect Similarity Threshold. One way that I overcome this is by doing multiple fuzzy merge matches. You can do the main fuzzy match then do a smaller merge to take care of some of the rows that didn’t match. This doesn’t always work and sometimes you will need to manually match the rows together, but this method tends to reduce the manual work that you need to do by a lot.
Walkthrough
In this walkthrough we are going to go through two different versions of fuzzy match. This first will be using the M-Code in the advanced editor, and the second will be using the function in power query.
At the end of the walkthrough I will go through the way that I like to verify my merge worked as I wanted it to. This is just one of many methods, but it has worked well for me in the past.
Advanced Editor
Warning: If you are not familiar with using Advanced Editor then I recommend using the second example. Advanced editor tends to be very complicated and can quickly ruin a query that you are working on.
To use the m-code, you will need to go to the power query. You do this by clicking Transform Data on the home ribbon.

Next you will want to go to the query that you want the merge to take place then click on advanced editor in the Home Ribbon. This should bring you to a pop-out page that looks similar to this. Note: The text in the box may differ according to the steps that you have taken in this query.
(Select advanced editor)

(inside Advanced Editor)

Now you should be able to write your code. The syntax is:
“Step Name” = Table.FuzzyNestedJoin(table1 as table, key1 as any, table2 as table, key2 as any, newColumnName as text, optional joinKind as nullable number, optional joinOptions as nullable record)
(formula in advanced editor)

Using this formula is not for the unexperienced user, so if you do choose to go this route, I heavily suggest having a background in M-code and Power BI.
Once you are done writing your formula you can click Done in the bottom right corner.
Power Query Function
To use the power query function, you will need to go to the power query by clicking Transform Data on the Home ribbon.

Next Select the First table that you want to merge and you can navigate to the Home ribbon, Merge Queries, then either Merge Queries or Merge Queries as New.

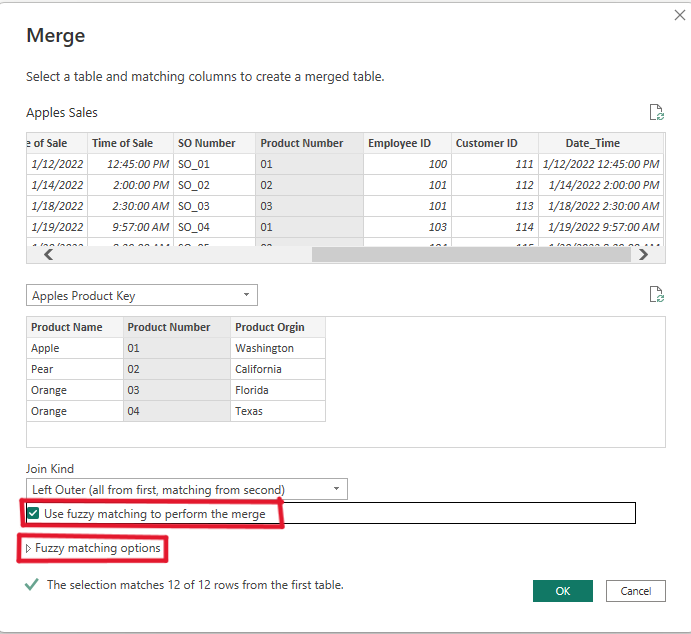
Now you can go through and add your queries as you normally would. But what you will want to do is check the “Use fuzzy matching to perform the merge” box. This will enable the default setting for the fuzzy merge (80% match).
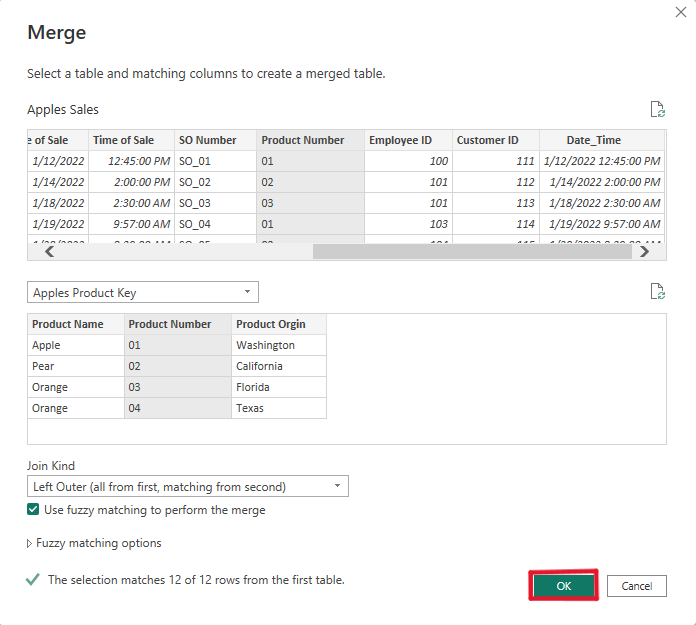
Once you are done you just click OK in the bottom right corner of the pop-out.
To change the settings on the fuzzy match you will need to open the Fuzzy Match Options dropdown in the Merge pop-out. This will give you a space to change the:
- Similarity Threshold: The percentage that a value must match the opposing value to be considered a match. The default is 0.80. In this you also get the option to ignore the case and match by combining text parts.
- Maximum number of matches: The maximum number of matches that you will allow the first table to match to the second table for a single value from the first table.
- Transformation Table: The option to use a third table as an intermediary table that matches the first and second table together using the values from the third table. Think of this as a table that is used to relate tables one and two or as an intermediary table.
Once your merge is completed you should see a new column at the end of your query where you can choose which columns you would like to expand from the second table.
Verifying Your Merge
This is the method that I like to use to verify that my merge went as planned when I am using a fuzzy match. There are a lot of things assumed when I use this method like the merge kind and the maximum number of matches, but it will normally show you a good idea of what is going on with your semantic model.
First you will need to go to the table that you used the merge on. Then open the matching column that you used for the merge from the second table. This will be the Index/relational column that you used for the merge.
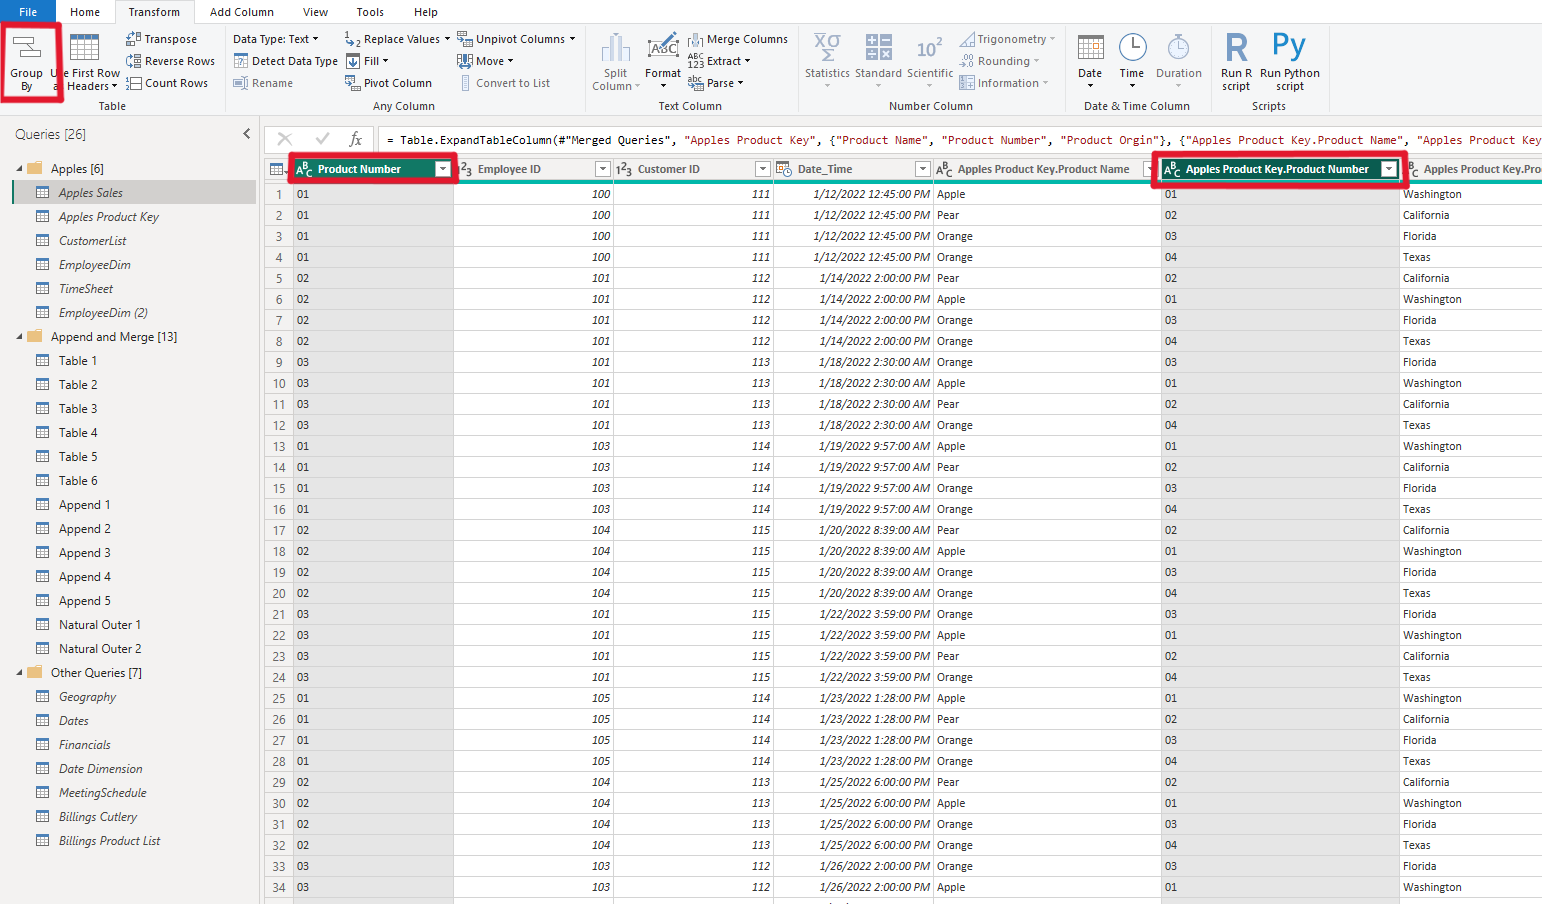
Next you are going to do an advanced group by counting the rows between the two tables. You will want to have both columns that you merged on (the relational columns) selected in the Group by pop-out, then do a count of the rows.
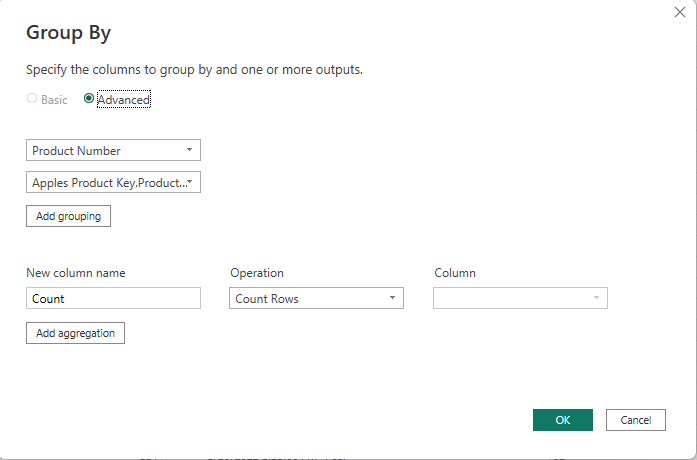
Once this is completed you will want to start filtering your relational columns and count column to find what values are blank and what counts contain only one or more than one match or less than two matches (this heavily depends on what your data should look like). There is not a specific procedure to follow, but your goal is to see if values are matching that should match and find values that are matching that shouldn’t match.
Conclusion
Merging is difficult to get perfect, but a fuzzy match can help us a lot when our data isn’t perfect. I hope that this blog either taught you how to use fuzzy match or gave you some insights on fuzzy match. If you want to learn more about merging you should check out the Append and Merge blog below.
Links to Related Articles:
Fuzzy Match Similarity Threshold
Fuzzy Match Transformation Table
Comments
3 Responses to “ Power BI: Fuzzy Match ”
[…] Fuzzy Match […]
[…] Fuzzy Match […]
[…] Power BI Fuzzy Match […]
Leave a Reply
You must be logged in to post a comment.