Power BI – Creating a Workspace
BY: David Rohlfs
Introduction
For those of you that already know how to create a workspace in Power BI, this will be a basic refresher of why you would want to and how you can create the workspace. This is one of the steps in creating reports for end users that need to be understood the most. This blog is not meant to go into detail about workspaces but give a basic understanding to any new-to-Power BI users.
In this article we will go over when to use a workspace, some common problems you may face when creating a workspace, and a short walkthrough of the steps to create a workspace.
When to use it
Workspaces are a must have for any report builder or end-user. This is the space that you will put all of your completed information so that others can use it. You can think of a workspace as a bin that you throw all of your reports, semantic models, dashboards, or dataflows into so that everything related to each other is in one convenient spot.
To do anything regarding reports, semantic models, or dataflows in Power BI, you will need to have a workspace.
My Workspace: You will always have a My Workspace workspace associated with your account inside of the Power BI Service. You should not be able to share this workspace or any of the reports inside of this workspace with anyone, but if there is ever a time where you can, DO NOT share anything. This is meant to be used as a space where you can test something, work through troubleshooting, or mess around in so that you can learn.
Common Problems
You do need to have a Power BI Pro license in order to create a new workspace. Note that if you do not have the pro license, you can still create and publish reports to your Personal Workspace (My Workspace), but you will not be able to share these reports through the Power BI Service.
When setting up permissions for members, I like to use this source. Roles in the Workspace. This is an essential part of allowing people access your workspace, and the table that it contains is something that I use almost every time I add people to a workspace.
Walkthrough
To start, go to PowerBI.Com and login using your organizational credentials.
Once you are logged in, you should see a page with a ribbon on the left side that looks like this:
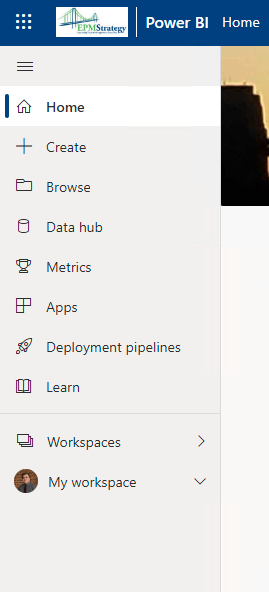
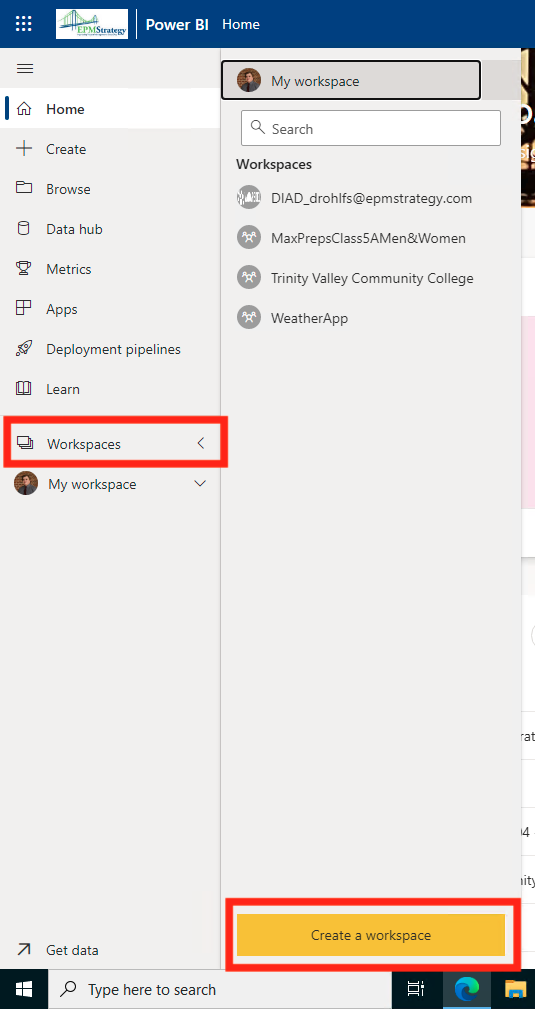
You can click on the Workspaces tab, and select the big yellow button titled “Create a Workspace”.
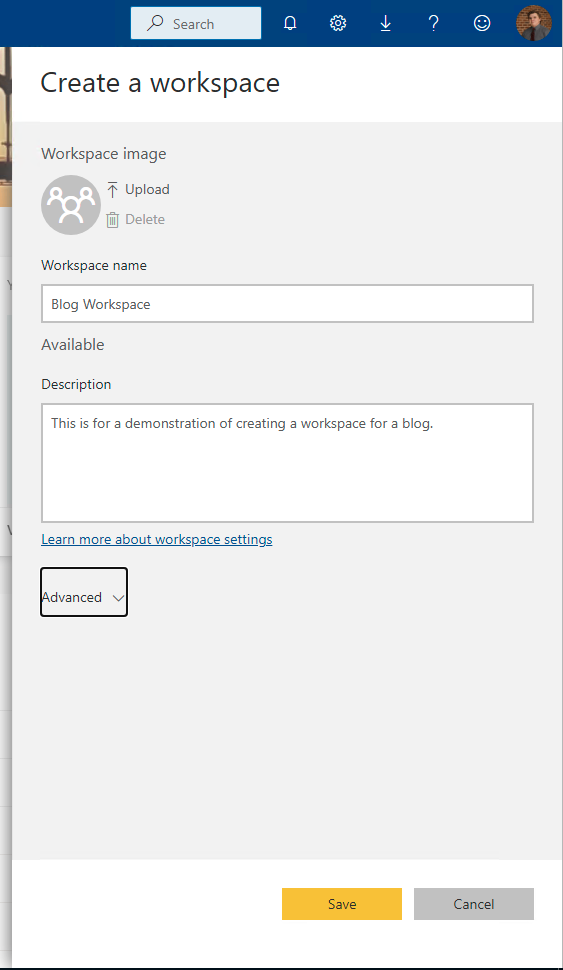
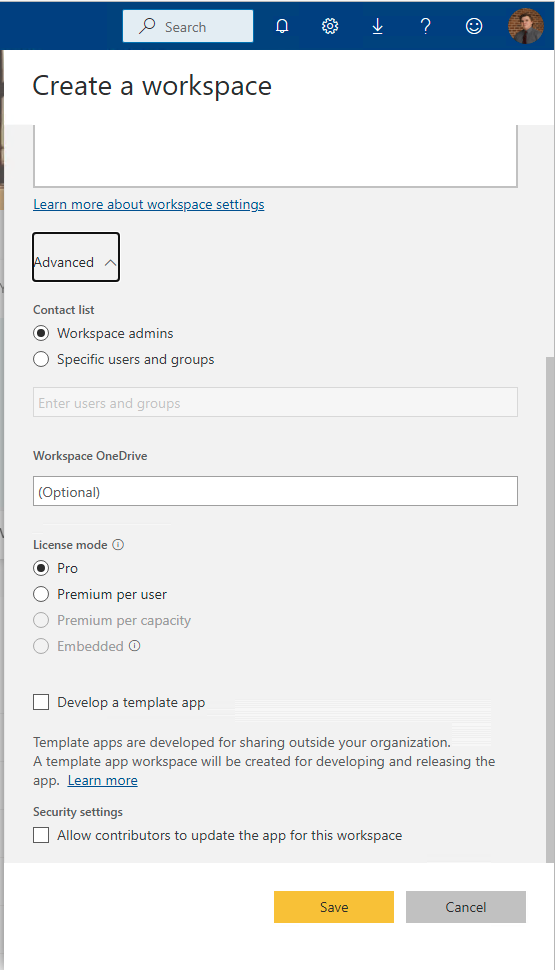
In the tab that comes up on the right side, you should see these options. I went ahead and filled out a title and description. The description is optional, but it is helpful when you are not the only person using this workspace, or this workspace gets passed on in the future. After filling out the information you can click on the Save button at the bottom of the tab.
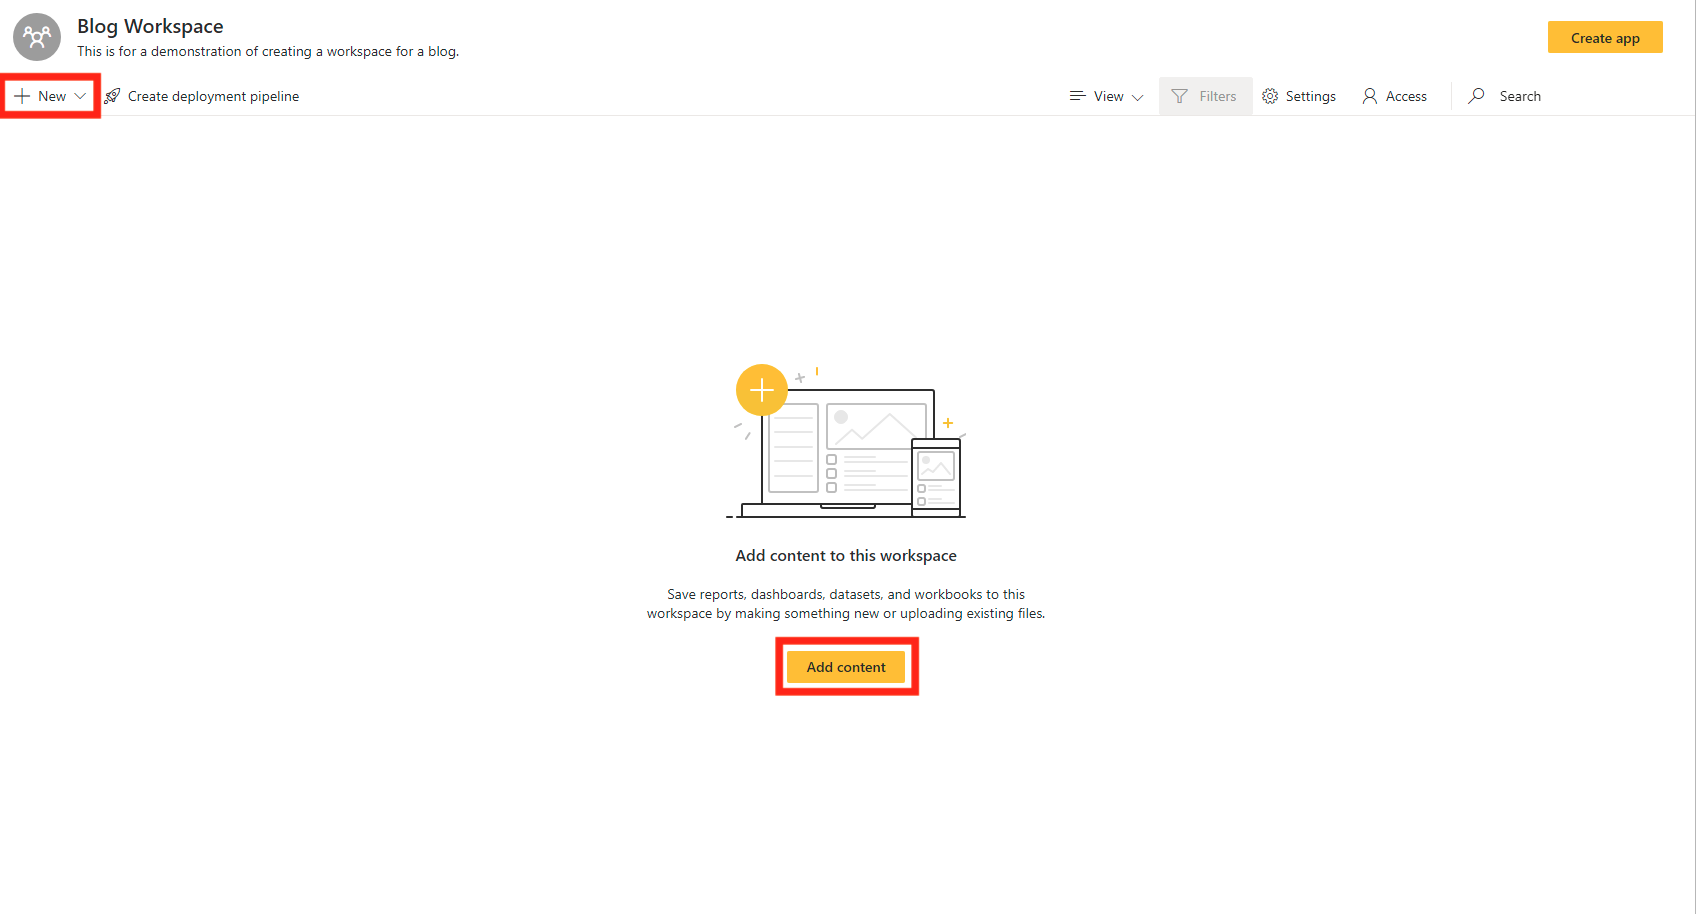
This is what your workspace should look like as soon as you create it. Since it is empty, you will have a yellow button in the center with the option to Add Content. You can use this or click on the New button in the top left of the workspace.
Conclusion
I hope that this helped you understand the basics on how to create a workspace and why you would want to create a workspace when using Power BI. Although this was a very basic blog, it is extremely essential to know this process if you are using Power BI in any capacity.
Comments
2 Responses to “ Power BI – Creating a Workspace ”
[…] Power BI – Creating a Workspace […]
[…] Creating a Workspace […]
Leave a Reply
You must be logged in to post a comment.