Power BI Date Time Format
BY: David Rohlfs
Introduction
Dates and times are one of the most utilized and important aspects of many reports. Attaching dates to sales or product categories or service allows you to do so much more with the data than having a stagnate amount. While Power BI does great at allowing you to use dates and times in your report, you still want to make the data work for you, and possibly change how the end user sees the data. In this blog we are covering this topic by talking about formatting date and time in Power BI Desktop. We suggest that you read through EPM Strategy’s Why Create a Date Table in Power BI before continuing in this blog.
When to use it
Formatting your date and time is very useful when the original format is unclear or wordy. For instance, if you only want to focus on a date and the time is irrelevant for your purpose, or vice versa, then you will probably need to format your date and time. Formatting your date and time can simplify the way your tables, cards, graphs, or formulas look.
When formatting in general, the most important thing to think about is what your end user will want and recognize. If your end user wants the exact time of day and specific date, then that is what needs to be accomplished, if they like to see the date written out with weekdays, then Power BI provides a method to do that for you. Everything that has to do with formatting is about what can convey the story better than the original product.
Common Problems
Formatted columns acting as text fields.
Just like when you are grabbing new data from the source, Power BI will automatically assume the data type that your column is. While writing this blog, there were a couple of instances where the date fields I created happened to be formatted as text. This is probably because the fields I formatted where not the normal date time formats that Power BI knows. To fix this all I had to do was go into the Power Query and select the correct data type for the columns.
Data Page not changing data
A problem that I noticed while formatting in the data page (Example 1) is that changing the information in the data page, didn’t alter the actual data. Basically, changing the format in the data page didn’t change the format on the report page. This is because what is happening is you aren’t changing the data in the original spot (Power Query), and instead changing it in a spot further down the chain (Data Page). So, Power BI doesn’t make the changes in all spots.
This error isn’t true for all the changes made in the data page, but it occurred for me because I was using both time and date, with the addition of not having a lot of space for my visual. For most cases using the format in the data page (Example 2) should work fine, but not always.
Walkthrough
There are a few ways to format date and time in Power BI. In this walkthrough we will do four of them. The examples will walk us through formatting date and time using the data page, power query, fields list, and DAX. Then after that we will go through a quick example of attaching the columns to a Date Dimension.
Example 1
The first example will be changing the format in the Data Page. This example is very simple, but it doesn’t transform your data, so this method usually doesn’t change how your visuals will look in the report page. None-the-less, if you are working a lot in your data page, you may find it helpful to format your date and time using this method.
After loading in your data, click on the Data Page on the left-hand side of your report. Now click on the field that you want to be working in, and the column that you are wanting to format.
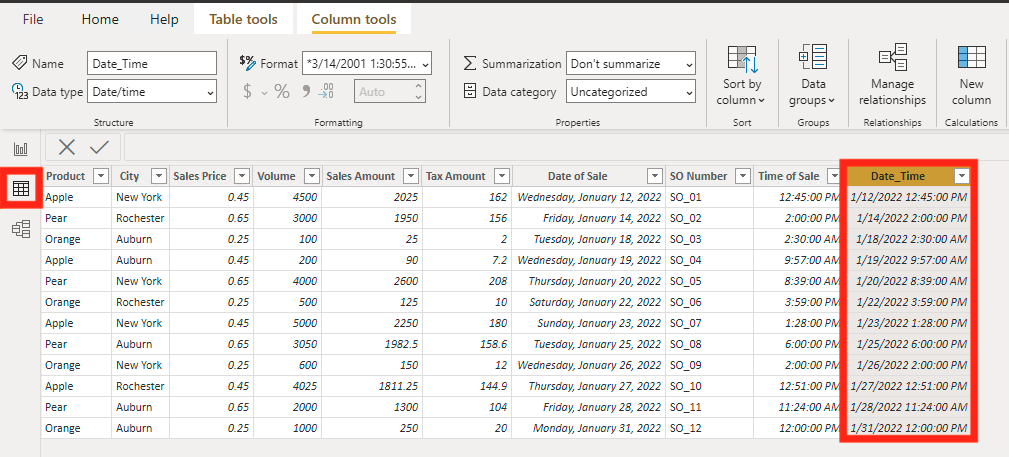
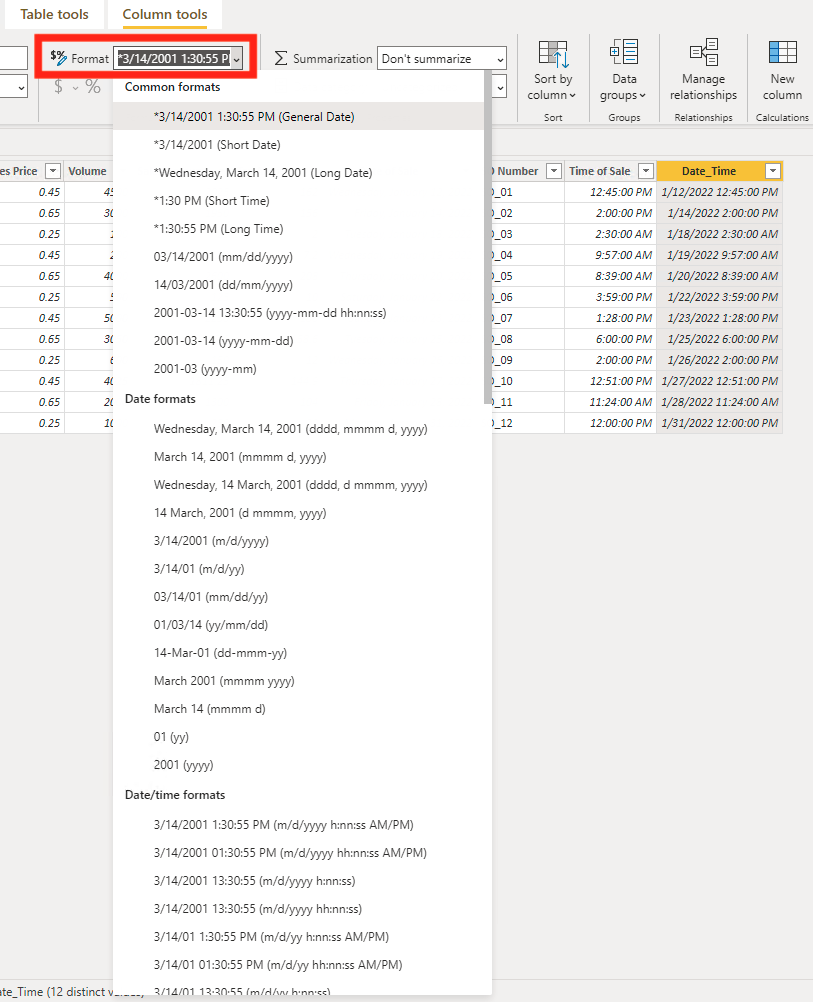
In the Column Tools (on the ribbon) you will see a section that says ‘Format’. If you click in this, Power BI will give you a list of options on how you want to format your data.
After you have chosen the format, you may notice that this only changes what you see in the data page, but usually doesn’t change the format in your report age.
Example 2
The second one will be changing the data inside of the Power Query. This one is simple but does have limited options. Unlike the first example, this transformation will alter your raw data, and because of this it is much more useful.
After clicking on transform data and finding the date or time column that you want to change, you can click on the Data type dropdown in the home ribbon. This will show you different formats for your cells, but it does show some date and time formats.
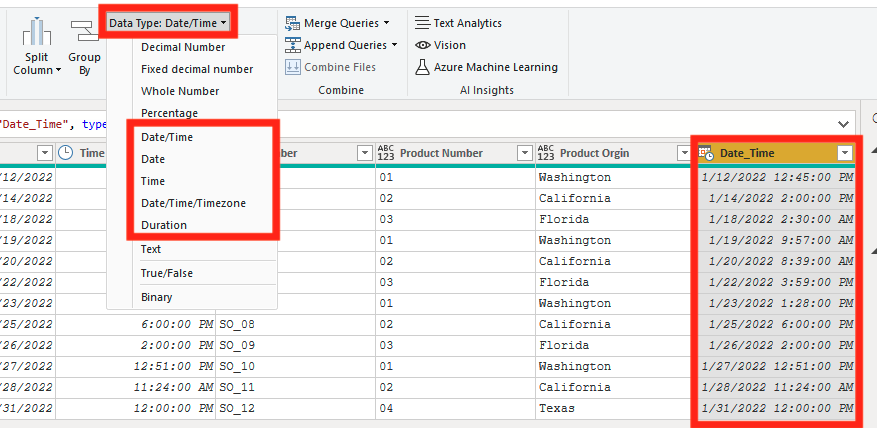
I prefer to use this method because it transforms your data from the first spot you see it. There is no need to use transformations in all three examples if this method suits your needs.
Example 3
In this third example, we are going through a very common method of changing the format. This method is in the report page, so it is very accessible while working on your report.
First you will need to select your field in the fields list. Then you will see a format option under the Column Tools tab of the top ribbon. Once you click the dropdown there are a lot of options in this spot.

Example 4
The fourth example will be creating a new column using the Format () function. I have found this method to be the most useful and the most complex of the three. It will create a new column that grabs from a pre-existing column and alters it to have the information that you want.
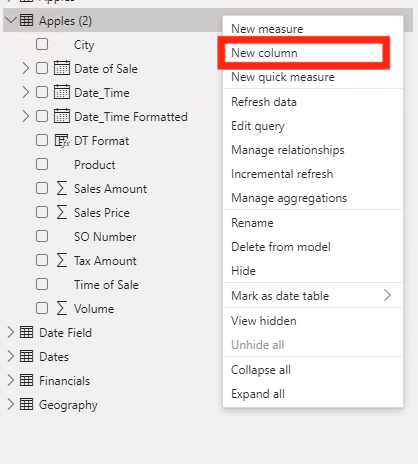
Click on the ellipses next to your field table that you will be using and select new column.
In the DAX formula builder, you can copy this expression and choose the date or time format that you want.
![]()
Here is a list of some common formats for date and time.
- “mm/dd/yyyy”
- “mm/dd/yy”
- “mm/dd”
- “yyyy”
- “mm/dd/yyyy, hh:mm”
- “hh:mm:ss”
- “hh:mm”
There are a lot more formats than this, but these are a few that I have used before.
Because this example creates a new column, it can become difficult to drill down using a date dimension and your new column. To do this I suggest using a drill through from your date dimension to your new column. Using a drill through in this situation will allow you to go through the year, month, day and then to your new column for time.
To learn about Drill Throughs, you can read this EPM Strategy Blog
Date Dimension
Now we will go through an example of attaching all three of the walkthroughs to a Date Dimension that will allow you to build relationships between different queries in your data. If you do not already have a Date Dimension, follow the hyperlink to another EPM blog about date dimensions. There is also an EPM blog on Basic Relationship Building in Power BI.
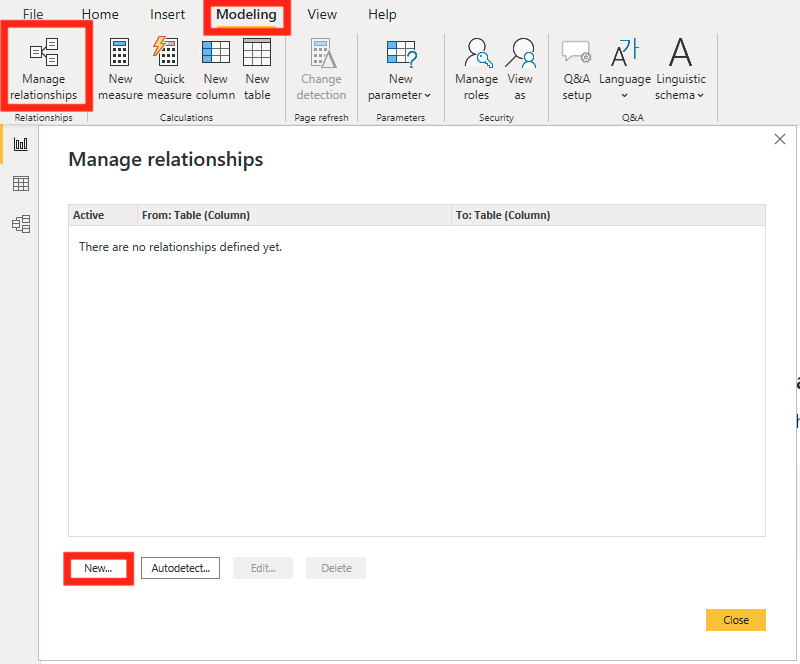
For the first two examples, what you need to do after you have loaded in your Date Dimension is to go to the Modeling tab on the ribbon, then click on manage relationships. Next you will click New.
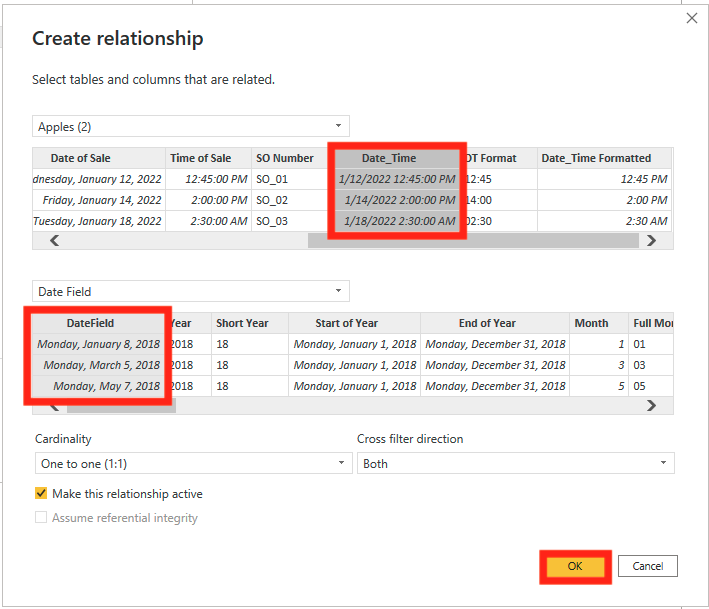
Now you can click on the two tables that you are wanting to create the relationships between (Your date dimension, and the table you formatted inside).
Now you can click on the two fields that you are creating the relationship through. For me it is the Date Field, and the Date of Sale. Then click OK in the bottom right corner.
After this I suggest creating a table or matrix with some information from each table, then using a slicer on it to check if the relationship is working.
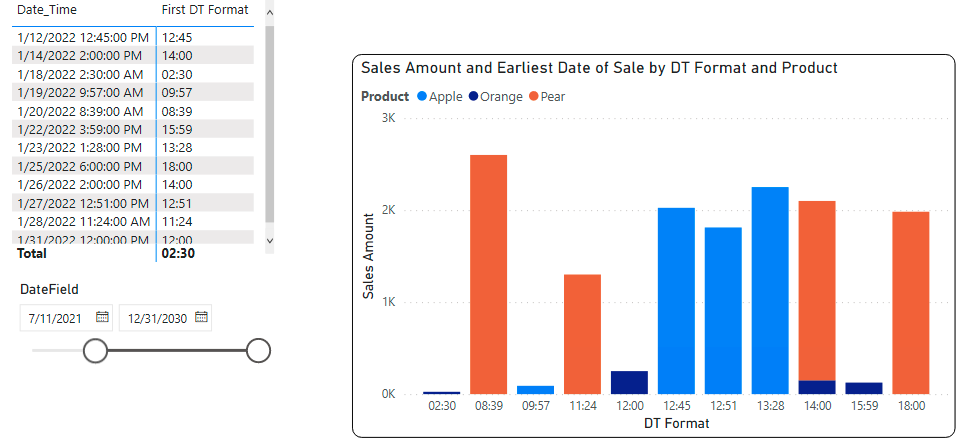
If you are working with a DAX created field (Example 3) then keep reading.
For example three, the only difference is that you will be using the field that you referenced for your connection. In the walkthrough I used Date_Time to format my new measure. When I did this, I encountered an error where all the dates on [Date_Time] were attached to January 1, 2018, in my date dimension. This occurred because I merged two different columns together to get [Date_Time]. To avoid this just make the connection with the original column that has the dates.
If you want to learn more about building relationships, then you can read through this blog. Basic Relationship Building
Conclusion
Formatting your date and times get easier as you get more practice. All the methods to format are very useful in their own ways, and I suggest trying all of them to figure out what works best for you and what your end-user likes the most.
Comments
One Response to “ Power BI Date Time Format ”
[…] Date Time Format […]
Leave a Reply
You must be logged in to post a comment.