Power BI Time Conditional Formatting
BY: David Rohlfs
Introduction
While many operations of an organization are focused on dates, there are still a lot of operations in a company that are focused on time. When you are building a report, or page of a report, that is focused on time, at some point you will likely need a table showing your raw data and what it means. Because plain tables are boring, Conditional Formatting can become very helpful.
In this blog we will go over when to use conditional formatting for time, and a walkthrough of building the equations for a time-based column.
Conditional Formatting for Time is very similar to our normal Conditional Formatting Using DAX from a previous EPM Strategy Blog, so this blog will also be describing building a calculated column for time.
When to use it
The main reason to use a conditional formatting for time is when you have a task that you want to start on time or end on time. The goal for writing this blog was to show why you would want to build conditional formatting for a time sheet or Clock In/Out report.
This method allows you to build a report that easily shows an end-user tasks that were not on time. Doing this creates many possibilities for showing color in a table that could otherwise be hard to read.
If you want to learn more on why Conditional Formatting can help your report, you can read through EPM Strategy’s Conditional Formatting, Conditional Formatting with DAX, or Date Conditional Formatting.
Walkthrough
In this walkthrough we are going to go through creating a calculated column to determine if a time is early, on time, or late. Then we are going to use this column to create a measure that conditionally formats colors.
If you have not already gone through EPM Strategy’s blog on Conditional Formatting with DAX or EPM Strategy’s blog on DAX Variables, I would suggest you do so. This blog will be building off the same concepts used in those blogs.
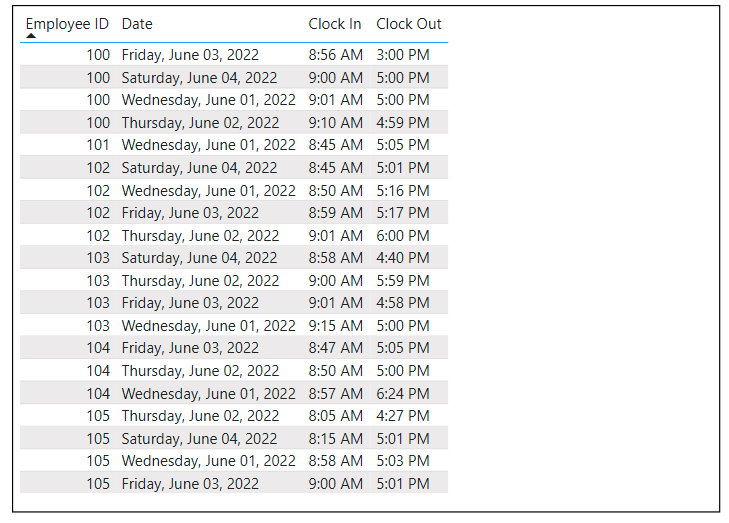
For my example, I am going to use a timesheet and determine if the employees were early, late, or on time for their clock in and clock out. I will be using this table to test my DAX formulas as we go.
First, we are going to write the DAX in a calculated column for my clock in. I prefer to write my longer DAX equations first in a notes page so that I can easily change or alter my DAX expressions.
Note: This next step is only necessary if you do not already have a conditional column set up for your clock in times.
For our formula we are going to write a DAX variables statement using this formula:
On Time Clock In =
VAR _Early = IF (‘TimeSheet'[Clock In] < Time (8, 50, 0), TRUE, FALSE)
VAR _OnTime = IF (‘TimeSheet'[Clock In] >= Time (8, 50, 0) && ‘TimeSheet'[Clock In] <= Time (9, 10, 00), True, False)
VAR _Late = IF (‘TimeSheet'[Clock In]> Time (9, 10, 0), True, False)
Return
Switch (True (),
_Early, “Early”,
_OnTime, “On Time”,
_Late, “Late”)
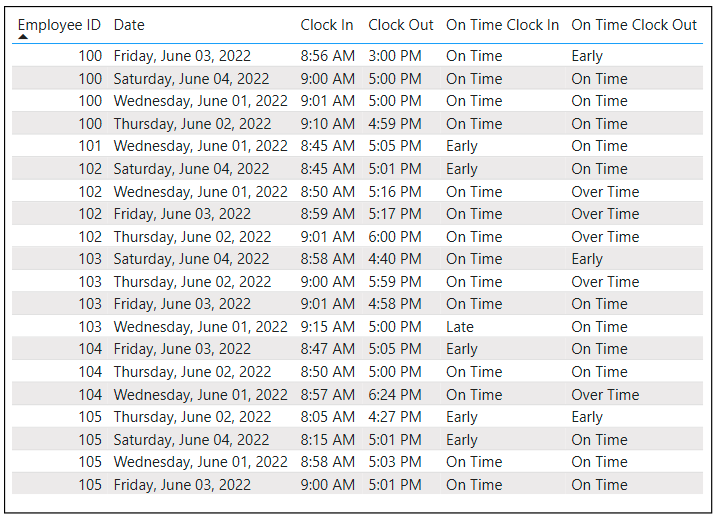
In our VAR statements we are going through and determining the time of day that we want to classify for Early, On Time, and Late. Then we are using a SWITCH () function in our Return Statement to replace my True statements with their respective classification.
Once the column has been created, we can add it into our table. I have gone ahead and made a Clock Out column in the same way.
Now we get to make our color measures. For this equation we are going to use a measure to help with our report performance.
Color Clock In =
VAR _Early = IF (SelectedValue (‘TimeSheet'[On Time Clock In]) = “Early”, True, False)
VAR _OnTime = IF (SelectedValue (‘TimeSheet'[On Time Clock In]) = “On Time”, True, False)
VAR _Late = IF (SelectedValue (‘TimeSheet'[On Time Clock In]) = “Late”, True, False)
Return
Switch (True (),
_Early, “#30602A”,
_OnTime, “#118DFF”,
_Late, “#FA5B5B”)
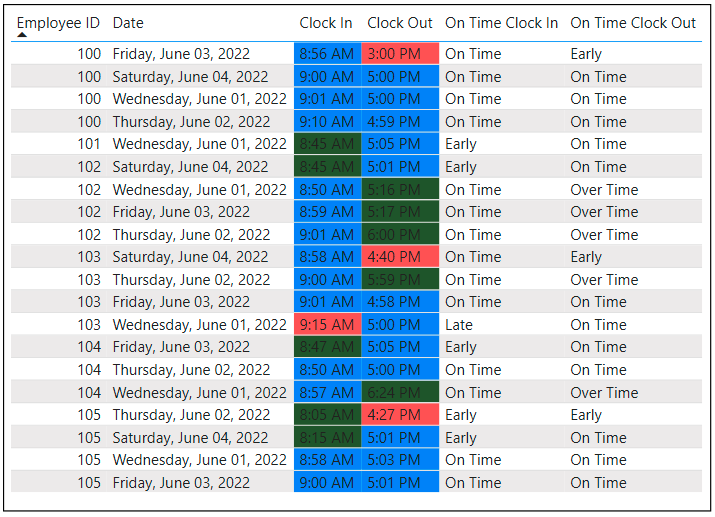
This equation is going through each row in our VAR statements and determining if they meet the requirements. Then in our Return Statement, we are switching our variables that were true to a color. Early is green, On Time is blue, and Late is red.
This is what it looks like in our Table.
If you use all the steps from this walkthrough, you can end with a page that is like this. I have used the calculated column to create slicers for both Clock In and Clock Out and have made a table with my Employee Dimension.
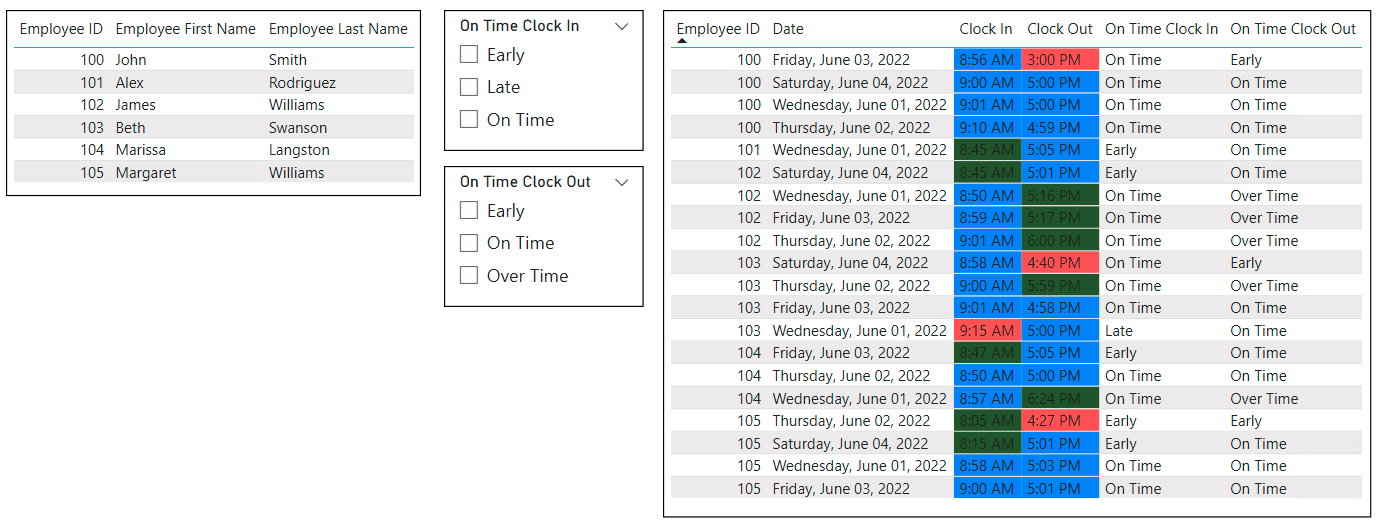
Although you can have both the calculated column and measure in the same measure, using this method allows you to easily build complementing slicers for the fields. It also simplifies the DAX equations to have the equations separate.
Conclusion
In this blog you learned how you can apply your DAX skills to conditional formatting for time. The goal of this blog was to address the scenario for conditional formatting for a time sheet and building slicers to reflect the results.
Comments
Leave a Reply
You must be logged in to post a comment.