Power BI – DAX Switch Function and Conditional Statements
By: David Rohlfs
Introduction
Does anyone else love nested IF Statements as much as me?! When you are trying to write conditional statements in DAX for Power BI, “IF” is one of the strongest functions. But SWITCH does it better! The switch function simplifies checking against multiple conditions in DAX, instead of using nested IF statements you can use a single SWITCH function.
This is in addition to a previous EPM Strategy blog about the switch function (linked below). This blog aims to talk about how the switch function works mainly with conditional statements.
In this blog you will learn about the switch function and how to use it along with a walkthrough demonstrating using the switch function in DAX. This blog will focus on conditional statements in the switch function. If you are looking for more, check out a previous blog post on the switch function linked below.
When to use it
The switch function is very powerful, and it does very well working with conditional statements in DAX. A great scenario is if you have a large nested if statement.

Instead of writing all of this out, formatting it, and testing it, use a switch function instead.

The switch function does the same thing as the nested if statement. If our condition is met, we use that respective value, if the condition is not met, we move onto the next option. In most cases of a nested if statement, this is exactly what we are trying to do but the switch function is cleaner and better on performance.
Let’s take a look at the syntax for switch because it can look a little ugly before formatting.
SWITCH(expression, value1, result1, value2, result2, ..., [else])
With an example and formatting (This helps with the SWITCH syntax a LOT)
SWITCH(
    [Category],
    "A", "Alpha",
    "B", "Beta",
    "C", "Gamma",
    "Unknown"
)
You can see from the syntax, we are just trying to meet an expressions value ([Category] is equal to “A”, “B”, “C”, or none). Then when the value meets the expression, the respective value is returned (“Alpha”, “Beta”, “Gamma”).
Walkthrough
We are going to keep this walkthrough very simple. If you are interested in a more in-depth walkthrough, check out the original Switch blog linked below. Our goal is to create a measure using switch that determines whether conditions are met.
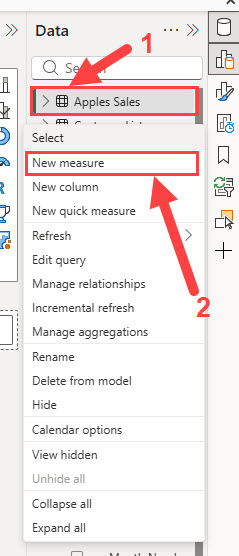
First, create a new measure. You can do this in your ribbon, or by left clicking on your query.
Now let’s type in our equation.
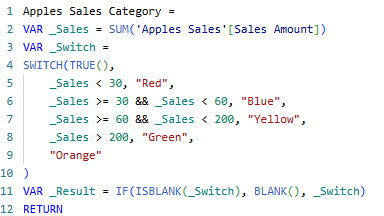
Notice my formatting. While this isn’t always taught, formatting your DAX will help you in the future if you or anyone else look at that equation. It isn’t super important with simple equations, but the more complex your DAX, the more formatting matters.
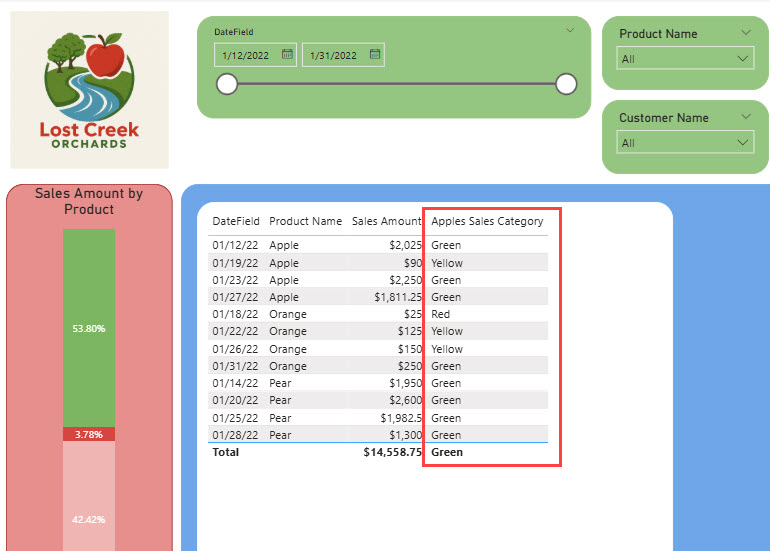
Here is what it looks like on a table:
Conclusion
Believe me, I love nested if statements because they are extremely powerful for being a function you learn very early on, but they aren’t the best! The switch function has big impacts on performance, maintenance, and especially readability. If this blog was interesting or helpful, please check out some of the other blogs linked below.
Links Related to This Blog:
Power BI Switch Function in DAX : :: Welcome To EPM Strategy ::
Comments
Leave a Reply
You must be logged in to post a comment.