Power BI: Adding Members to a Workspace
BY: David Rohlfs
Introduction
Eventually, you will need to add members to a workspace in Power BI. This isn’t because you need help with everything, or that you can’t organize a great workspace by yourself. But it is just the easiest way to share information and reports with Power BI. Going through this process is simple and easy, but there are a few buttons that you won’t know to click if you don’t learn from someone. In this blog, we are going to go over how to grant workspace access to someone and some of the things you should know when giving access.
When to use it
There are a lot of permissions and many spots that you can leak data if you are not careful when adding members to workspaces. The basic rule is that you only have one or two admins (Usually a service account or IT person), a few members that are very familiar with Power BI Service, as many contributors as needed, and viewers that are not familiar with Power BI. This basic rule is how I like to determine what access I want to give people in workspaces.
Some things that you should remember the first few times you add people to a workspace are:
- You need to have the same organizational email (can’t be outside of your organization).
- You need to have a pro account to create a workspace that is shareable.
- You should approve whoever you are adding to your workspace with your supervisor or organization.
- Do not give admin access to anyone! Obvious exception if they should be an admin, but for the most part you won’t ever have more than two admins in a workspace.
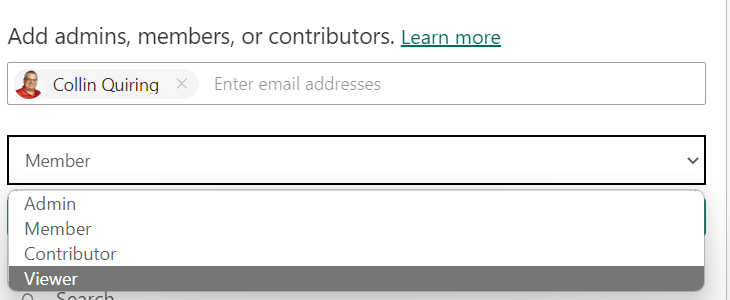
When you add someone to a workspace, it is going to ask you what permissions you want to give them. I prefer to reference Microsoft’s official table with descriptions of what each permission level has. Roles in Workspaces in Power BI
Common Problems
You cannot share a workspace with someone outside of your organization. If you wish to share something from a workspace outside of your organization, you can choose to send them an app. If you do this make sure that you don’t give them any access to your semantic model.
Walkthrough
In this walkthrough we are going to go over adding a member to a workspace.
First thing that you will want to do is to go to the workspace that you are wanting to share. Note: you will need to have a Pro account to create a shareable workspace.
Once you get to your workspace, you should see a button towards the top right that says “Access”. You can go ahead and click this.

You should have a pane pop up on the right side of your screen that looks similar to this.
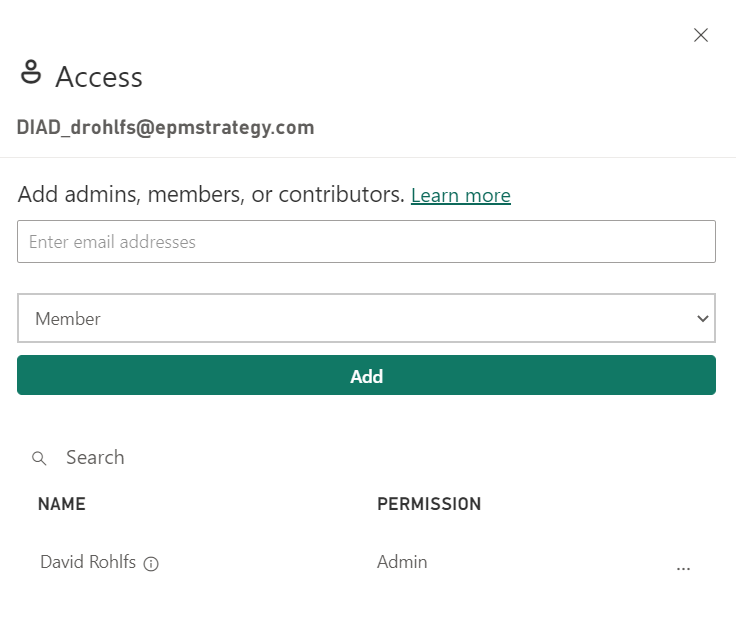
In this you can go ahead and add your colleagues email address and select what permissions to want to give them. When giving permissions be careful that you do not give too many permissions to one person.
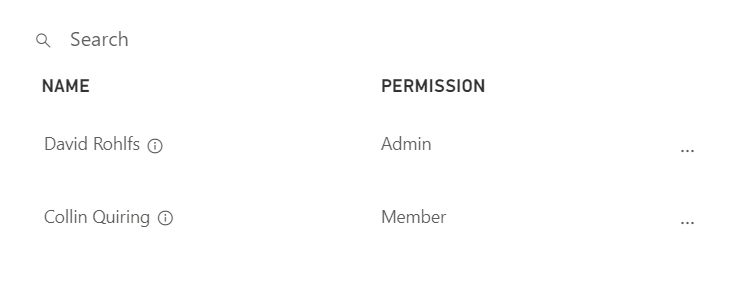
After you add someone to your workspace you should see their name and permission appear here.
That is how you add someone to your workspace. It is very simple, but you do need to be careful when doing it to only give the permissions you want them to have.
Conclusion
Hopefully this blog gave you the insights that you need to properly add a new member to your workspace. This is somewhat difficult to do if you haven’t been taught, but once you learn it, it seems very simple and repeatable.
Comments
Leave a Reply
You must be logged in to post a comment.